使用Instant-ngp中的编码技术,使Neus可以更快的进行inference,大概只需要5~10min生成一个模型
NVlabs/instant-ngp: Instant neural graphics primitives: lightning fast NeRF and more (github.com)
zhaofuq/Instant-NSR: Pytorch implementation of fast surface resconstructor (github.com)
kwea123/ngp_pl: Instant-ngp in pytorch+cuda trained with pytorch-lightning (high quality with high speed, with only few lines of legible code) (github.com)
neus:对无纹理的区域处理的很差
无论文,来源Neus的issue:Train NeuS in 10min using Instant-NGP acceleration techniques · Issue #78 · Totoro97/NeuS (github.com)
bennyguo/instant-nsr-pl: Neural Surface reconstruction based on Instant-NGP. Efficient and customizable boilerplate for your research projects. Train NeuS in 10min! (github.com)
环境配置
autodl镜像:
GPU 3090
PyTorch 1.10.0
Python 3.8(ubuntu20.04)
Cuda 11.3
- 安装tiny-cuda-nn扩展之前需要编译好环境
- 安装tiny-cuda-nn
pip install git+https://github.com/NVlabs/tiny-cuda-nn/#subdirectory=bindings/torch- 这一步可以先通过clone tiny-cuda-nn,然后在bindings/torch文件夹下运行
python setup.py
- 这一步可以先通过clone tiny-cuda-nn,然后在bindings/torch文件夹下运行
- 需要提前准备好cuda、cmake、gcc等环境NVlabs/tiny-cuda-nn: Lightning fast C++/CUDA neural network framework (github.com)
- auto-dl生成实例时可以选择pytorch>=1.10.0,cuda11.3or higher,cmake需要升级版本
- 带你复现nerf之instant-ngp(从0开始搭环境) - 知乎 (zhihu.com)
wget https://cmake.org/files/v3.21/cmake-3.21.0.tar.gztar -zxvf cmake-3.21.0.tar.gzcd cmake-3.21.0./bootstrap && make && sudo make installcmake --version
- cmake编译完成后,如果cmake -version失败需要进行环境变量的配置
vim 保存并退出 :wq
- 带你复现nerf之instant-ngp(从0开始搭环境) - 知乎 (zhihu.com)
- sudo apt-get install build-essential git
- 然后对tiny-cuda-nn进行编译,此处需要用到cuda,因此需要带GPU模式开机
$ git clone --recursive https://github.com/nvlabs/tiny-cuda-nn$ cd tiny-cuda-nntiny-cuda-nn$ cmake . -B buildtiny-cuda-nn$ cmake --build build --config RelWithDebInfo -j
- 最后运行setup.py,如果不在全局环境安装,亦可在conda虚拟环境中安装
tiny-cuda-nn$ cd bindings/torchtiny-cuda-nn/bindings/torch$ python setup.py install
- 安装tiny-cuda-nn
- 编译完成cmake和tiny-cuda-nn后,创建虚拟环境并利用pip安装python库
conda create -n inneus python=3.8conda init bash初始化bash终端conda activate inneuspip install -r requirements.txt- torch=2.0.1 , torchvision=0.15.2 ,pytorch-lightning= 1.9.5
pip install git+https://github.com/NVlabs/tiny-cuda-nn/#subdirectory=bindings/torchpip install trimesh -i https://mirrors.ustc.edu.cn/pypi/web/simple/
数据集
NeRF-Synthetic,解压并放在/load文件夹下,The file structure should be like load/nerf_synthetic/lego.
1 | # train NeRF |
代码快照、ckpt和实验输出保存在 exp/[name]/[tag]@[timestamp],而TensorBoard日志可以在 runs/[name]/[tag]@[timestamp] 找到。您可以通过在YAML文件中指定参数而无需添加—来更改任何配置,例如:python launch.py --config configs/nerf-blender.yaml --gpu 0 --train dataset.scene=lego tag=iter50k seed=0 trainer.max_steps=50000
test,生成mp4和mesh的obj文件1
2
3
4
5
6
7
8python launch.py --config path/to/your/exp/config/parsed.yaml --resume path/to/your/exp/ckpt/epoch=0-step=20000.ckpt --gpu 0 --test
- eg:
python launch.py --config exp/neus-blender-lego/example@20230601-185640/config/parsed.yaml --resume exp/neus-blender-lego/example@20230601-185640/ckpt/epoch=0-step=20000.ckpt --gpu 0 --test
or:
### neus-blender-chair/example@20230624-191845/
python launch.py --config exp/neus-blender-chair/example@20230624-191845/config/parsed.yaml --resume exp/neus-blender-chair/example@20230624-191845/ckpt/epoch=0-step=20000.ckpt --gpu 0 --test
eg: neus_chair
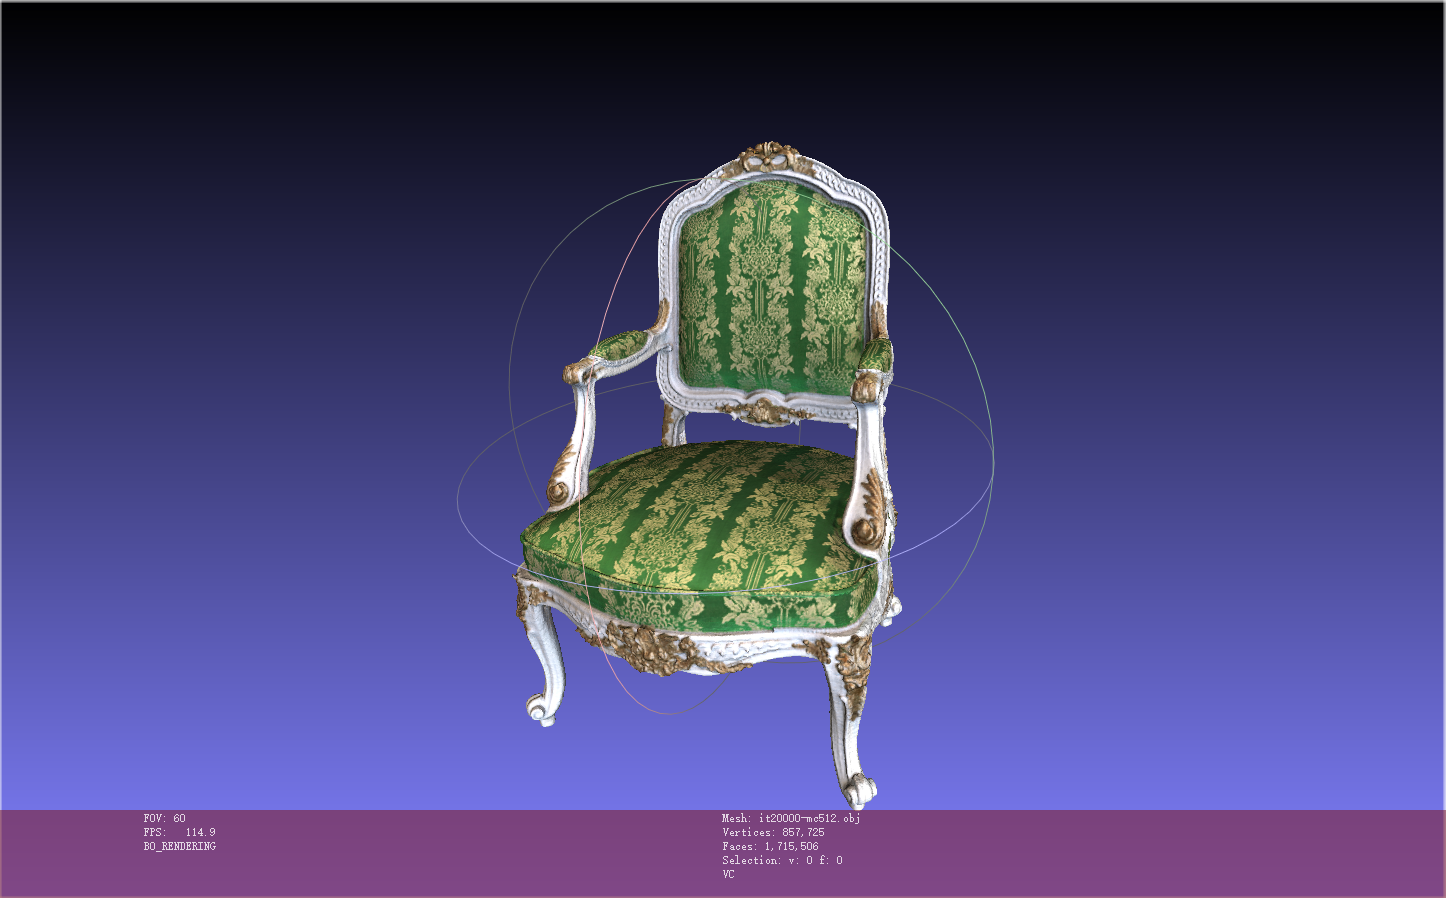
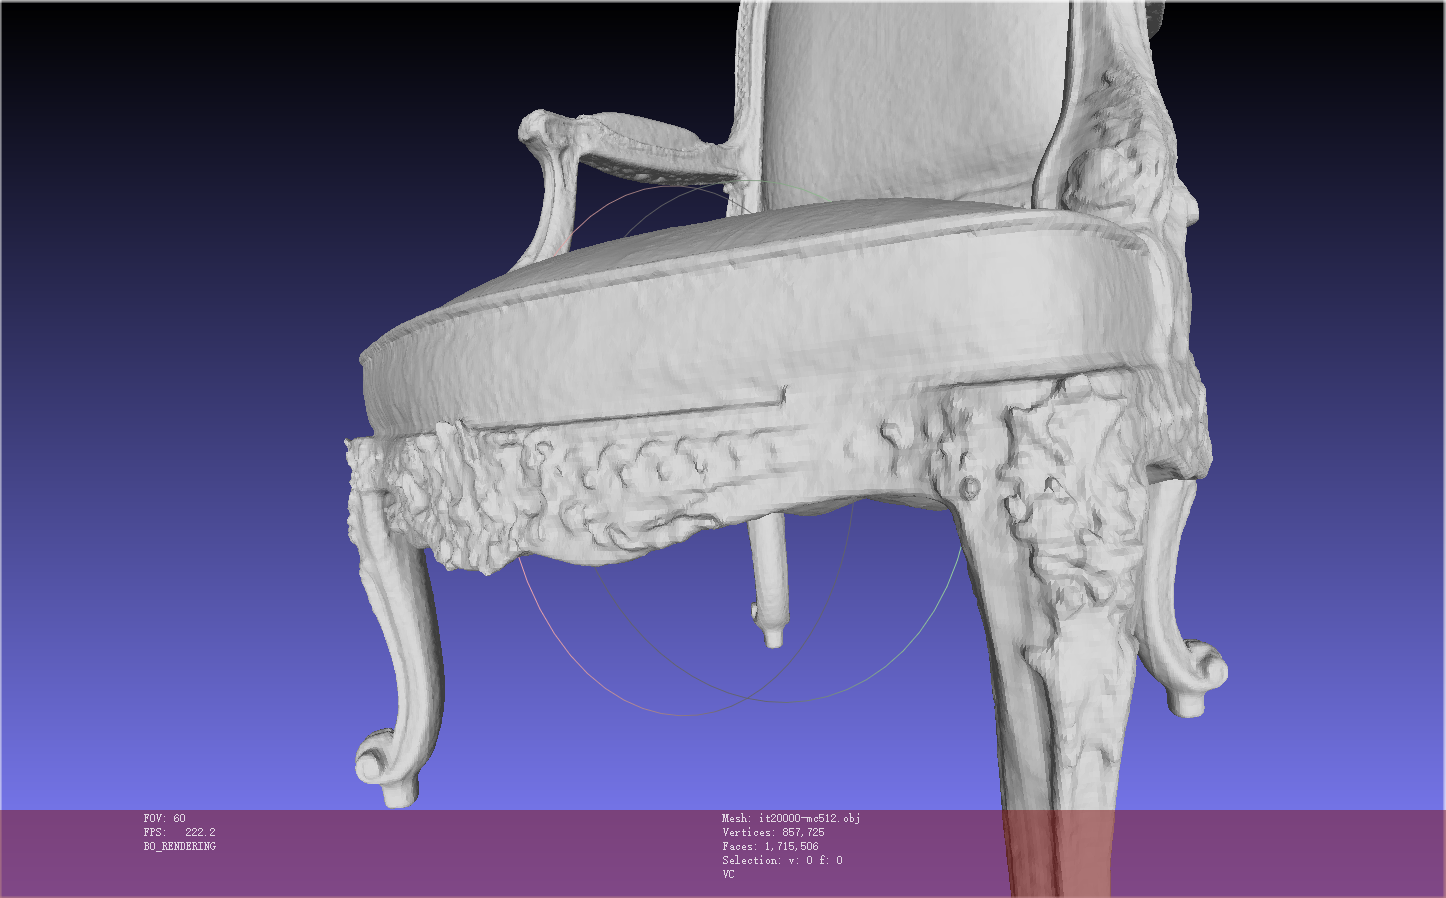
neus_chair_wmaskpython launch.py --config configs/neus-blender.yaml --gpu 0 --train dataset.scene=chair tag=example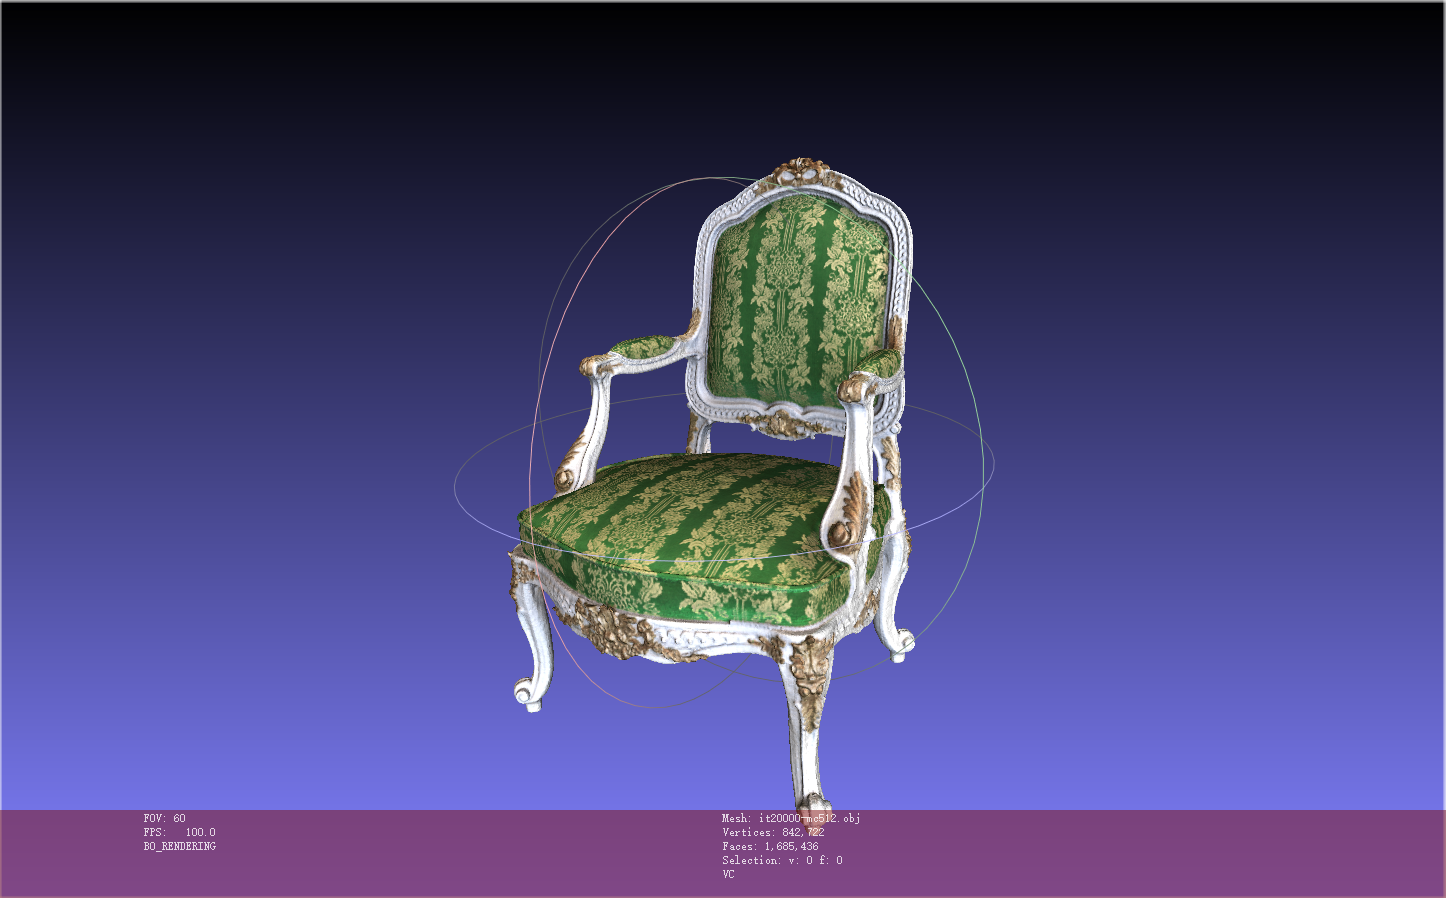
nerf生成mesh的obj文件很小(nerf_chair):python launch.py --config configs/nerf-blender.yaml --gpu 0 --train dataset.scene=chair tag=example
neus_chair_womaskpython launch.py --config configs/neus-blender.yaml --gpu 0 --train dataset.scene=chair tag=chair system.loss.lambda_mask=0.0
eg: neus_lego
neus_lego_wmaskpython launch.py --config configs/neus-blender.yaml --gpu 0 --train dataset.scene=lego tag=lego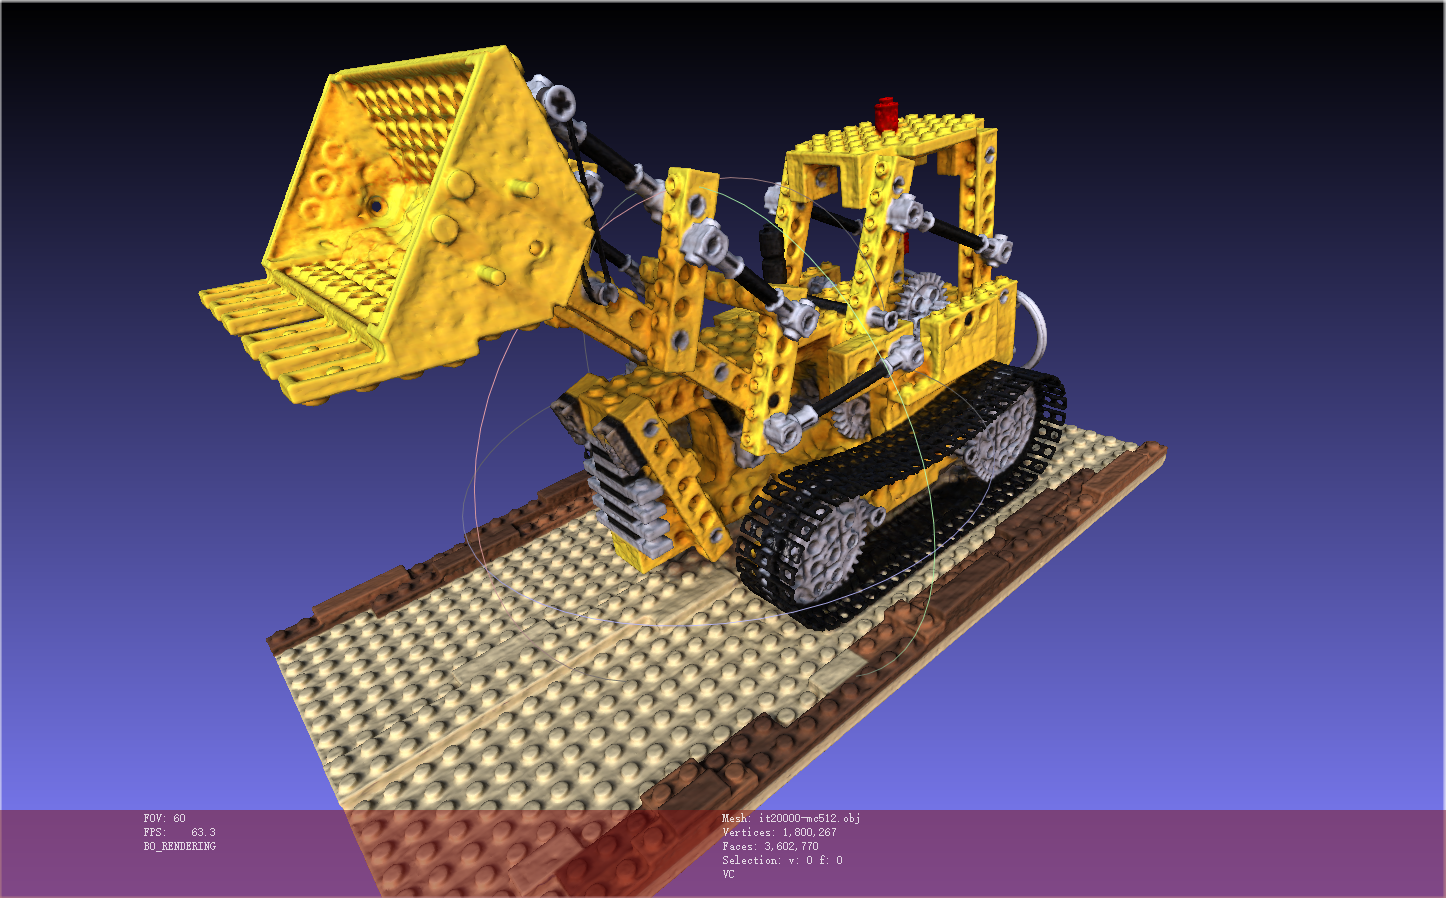

neus_lego & w/o maskpython launch.py --config configs/neus-blender.yaml --gpu 0 --train dataset.scene=lego tag=example system.loss.lambda_mask=0.0
迭代20000步,大致需要18分钟,生成的模型细节还是不够精细
Blended_MVS,DTU
1 | # train NeuS on DTU without mask |
[!note]
作者只提供了DTU数据集的加载方式,但是DTU和Bmvs相差不大,因此只需要作微小修改即可完成bmvs数据集的处理:
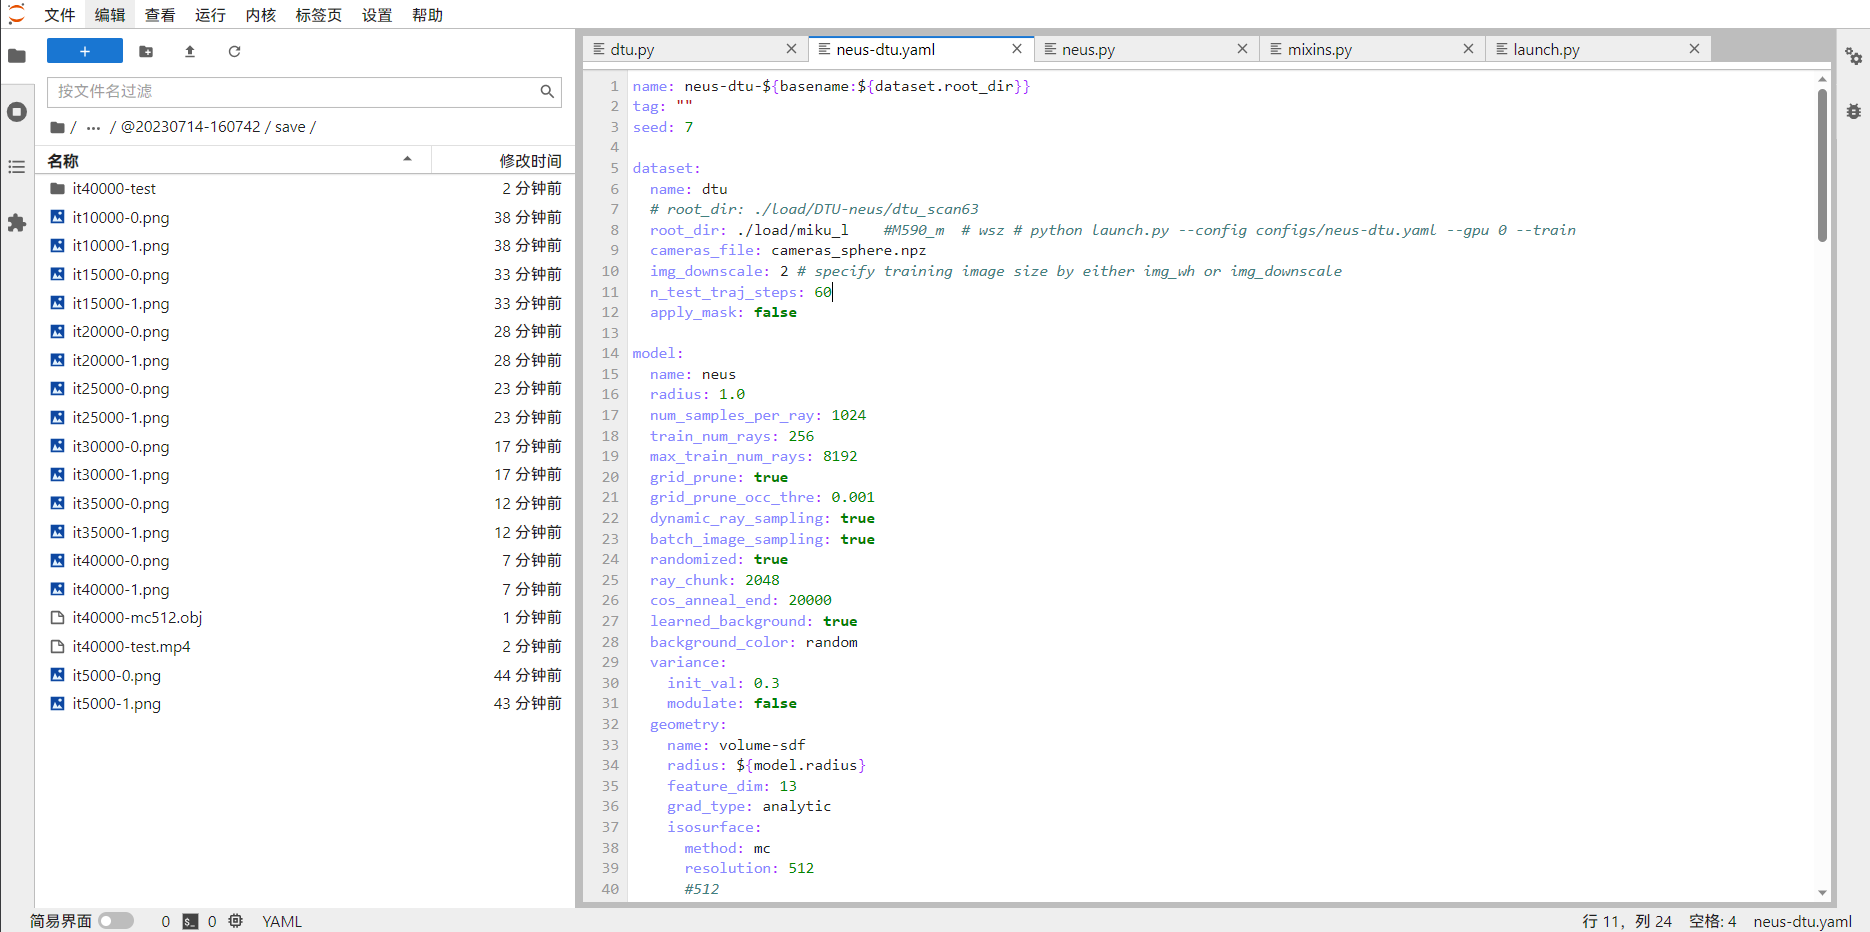
修改config/neus-dtu.yaml文件,dtu保持不变(需要用到dtu.py数据集加载文件),修改数据集的文件路径(dtu与bmvs数据集差别不大,都是由image、mask和cameras_sphere.npz组成
在/datasets/dtu.py中修改数据集的文件名,
- dtu的是前面补0到6位数.png
- bmvs是前面补0到3位数.png
1 | 灵活调整dtu.py 文件 |
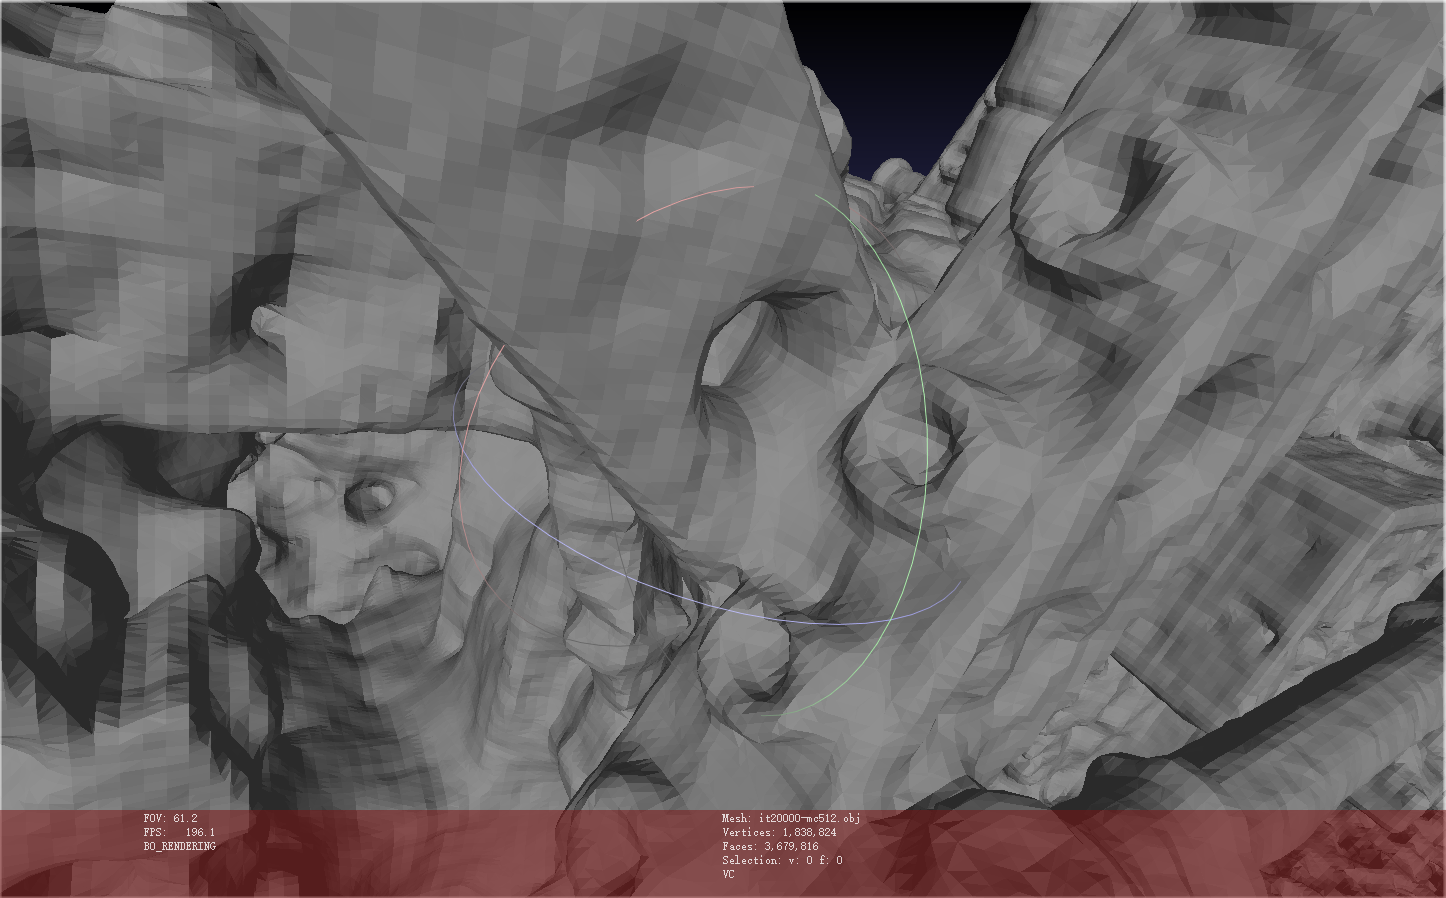
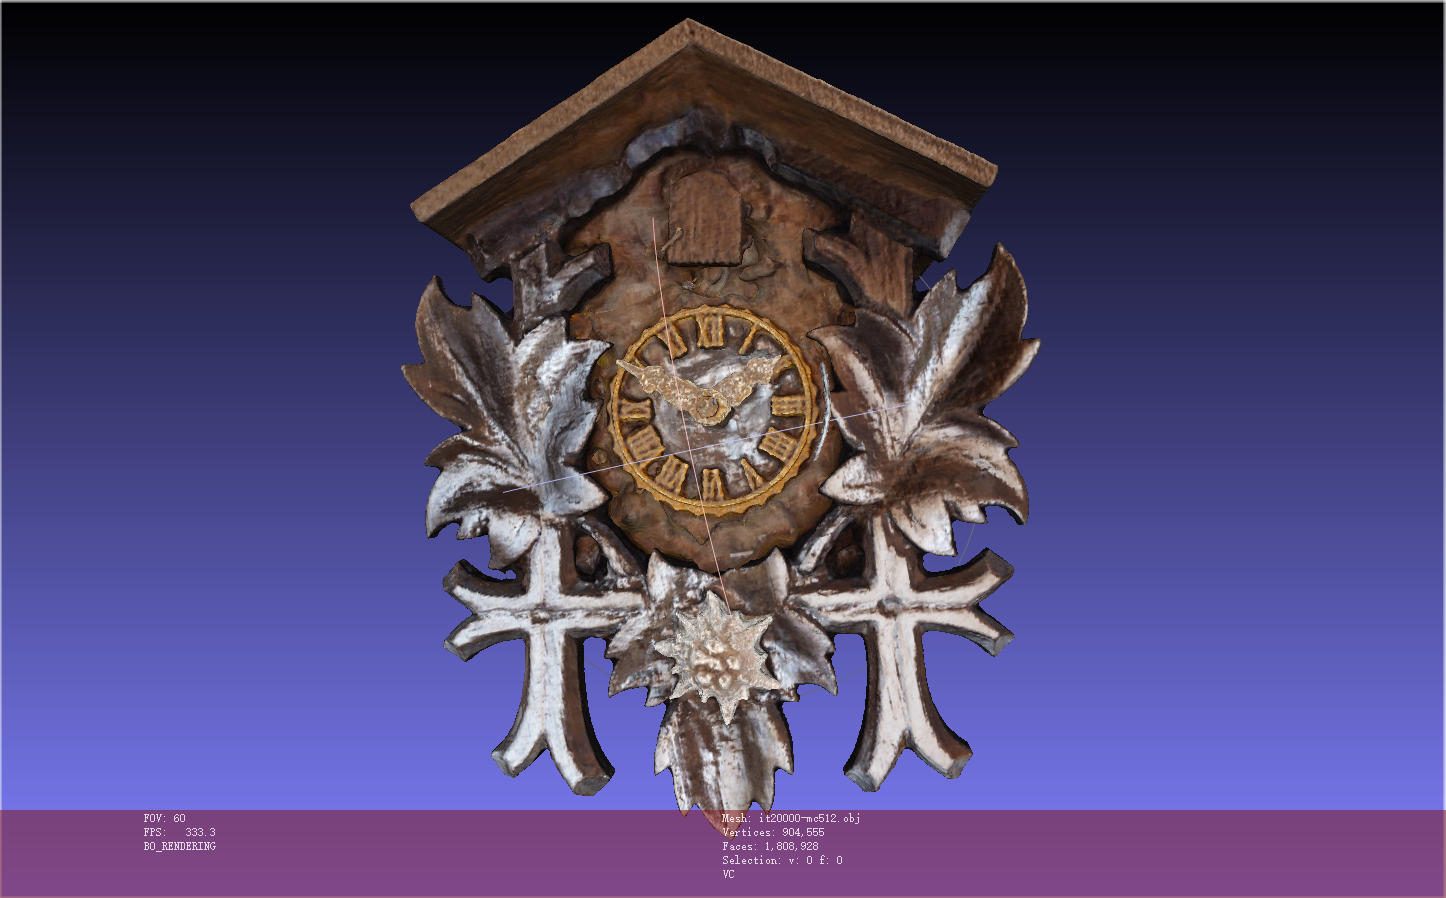
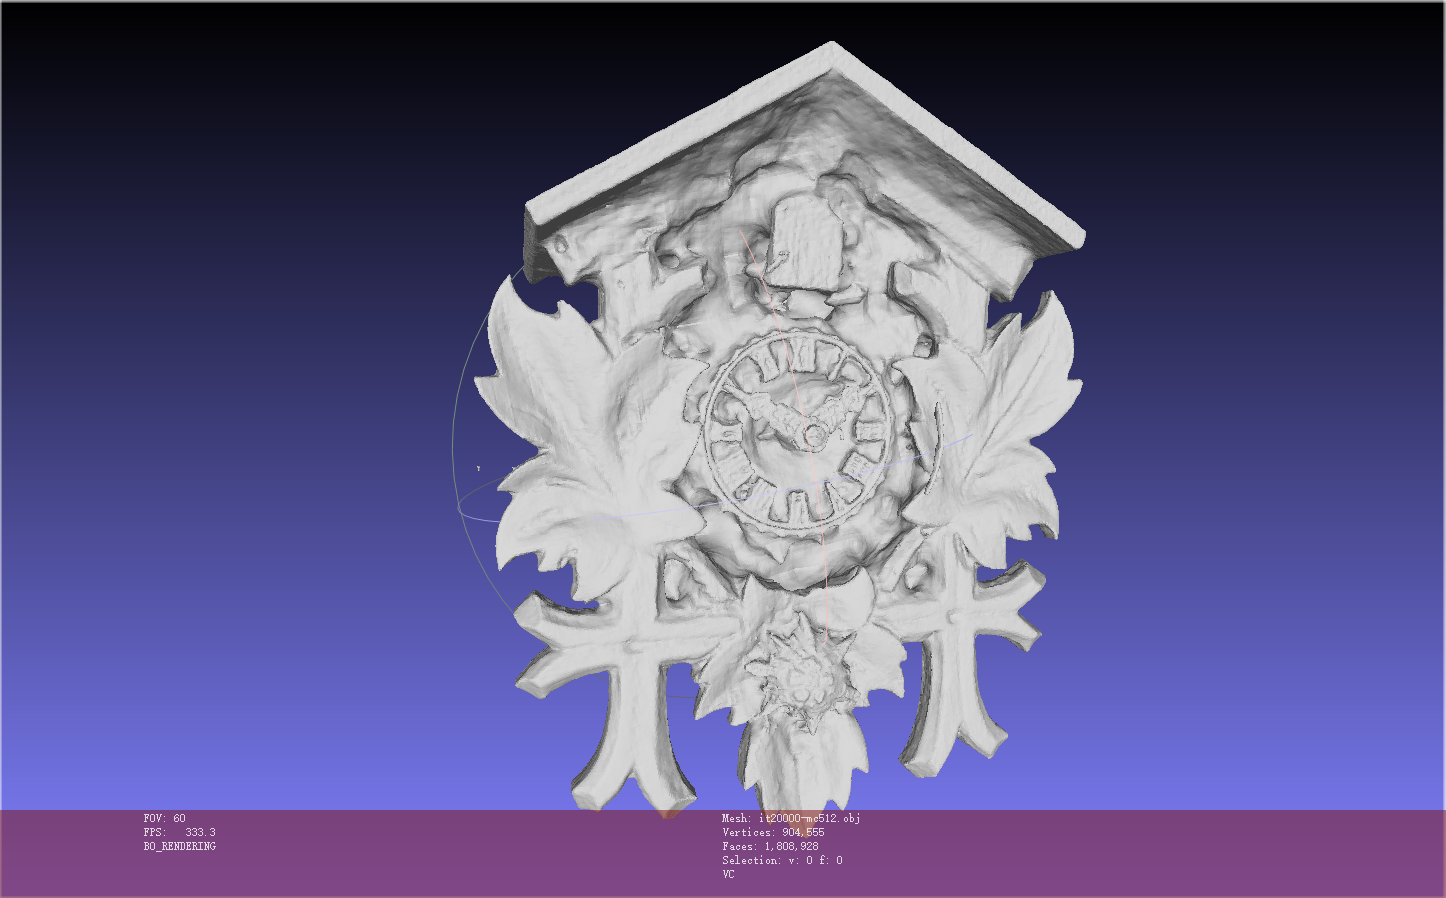
eg: neus_bmvs_clock_womask
python launch.py --config configs/neus-dtu.yaml --gpu 0 --train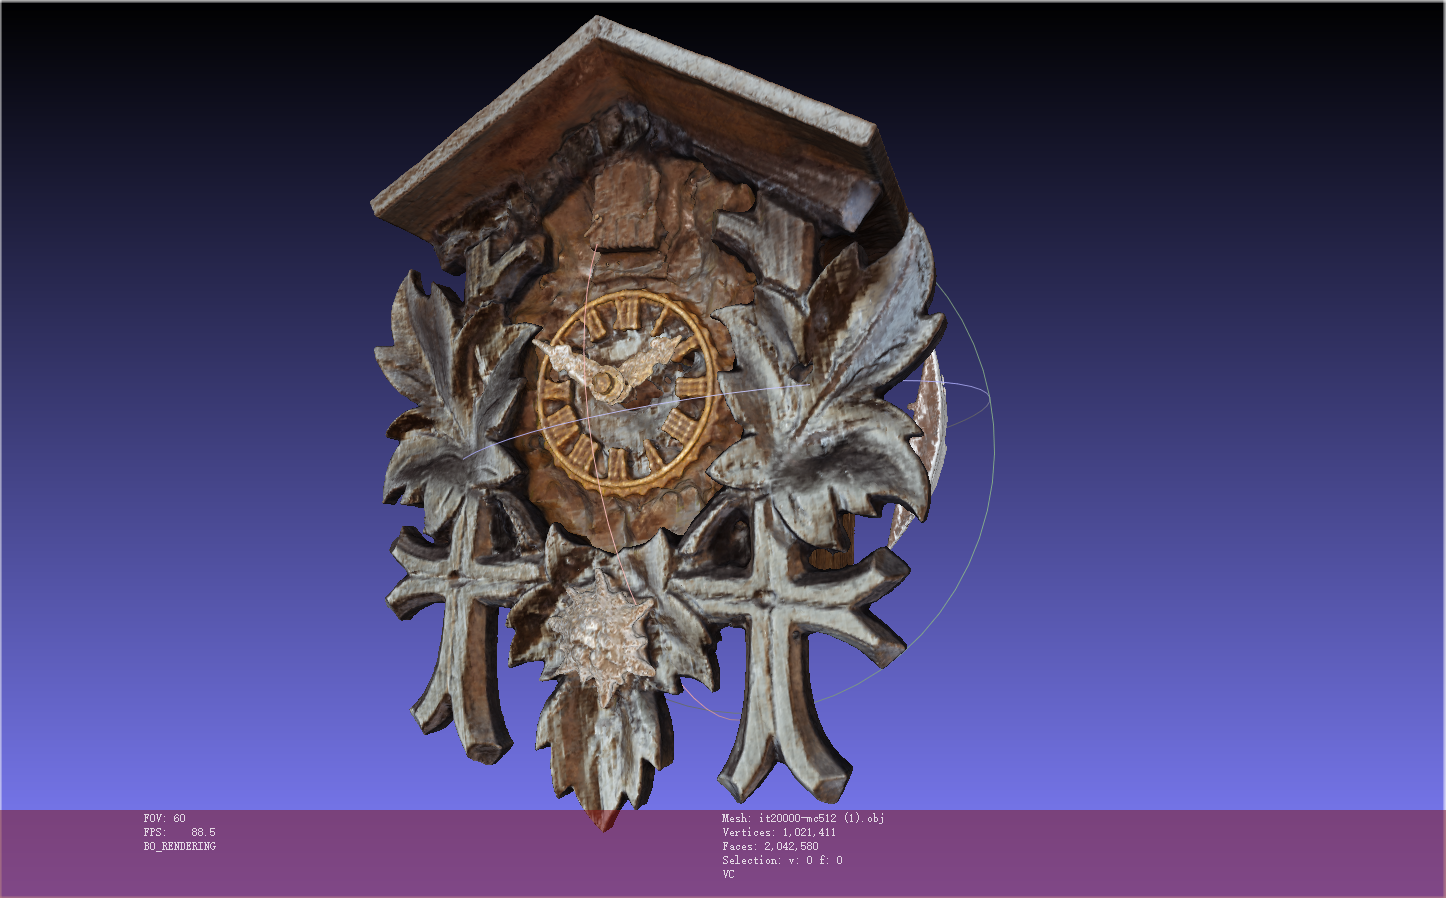
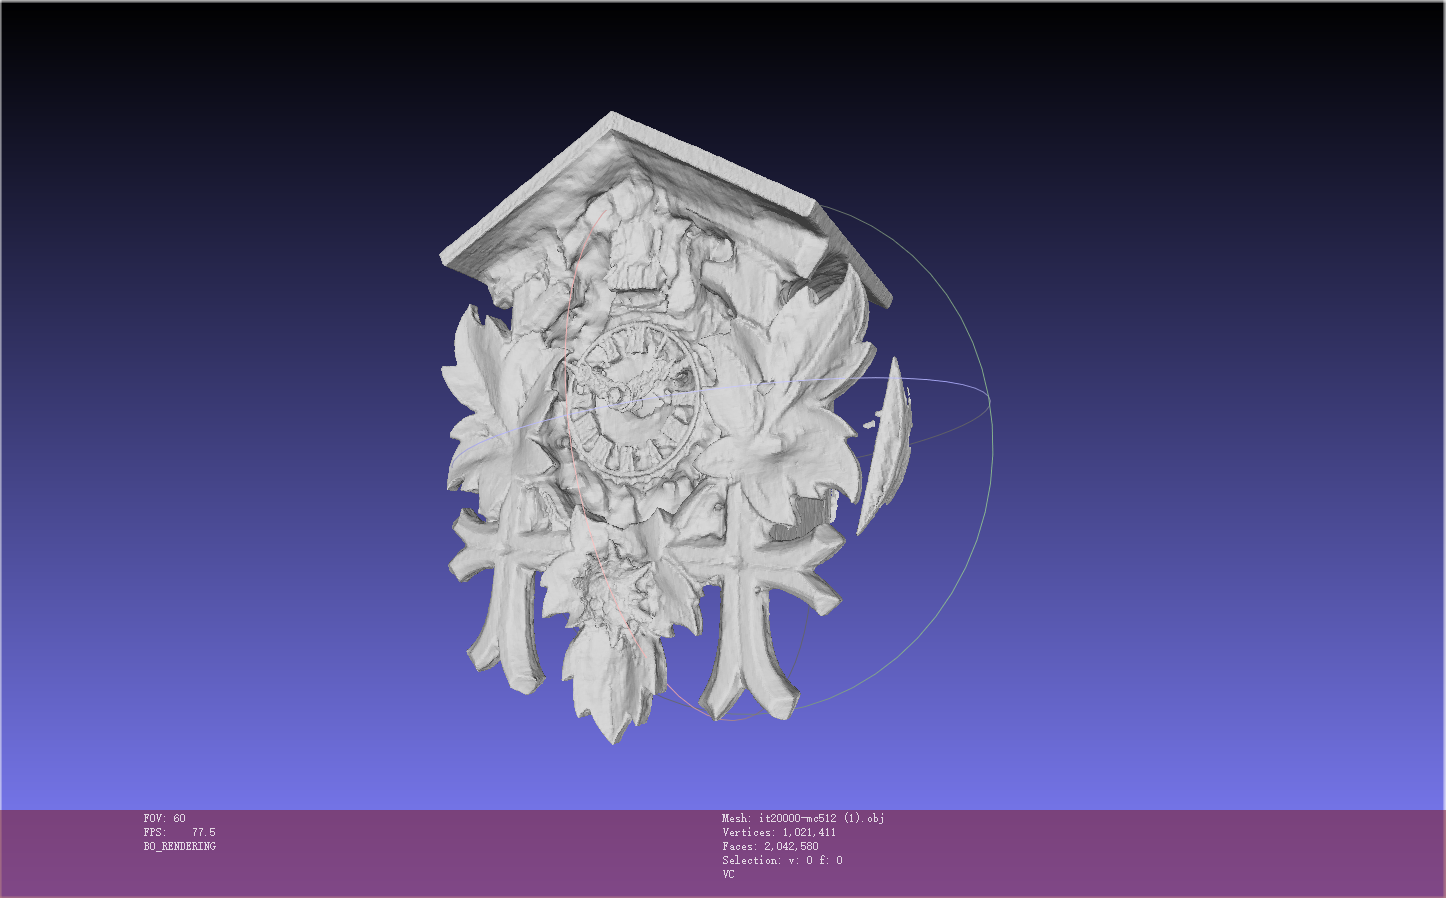
也有噪声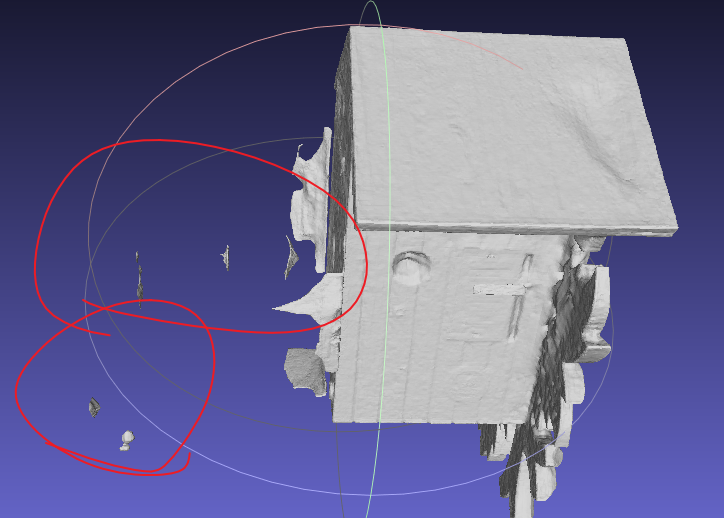
eg: neus_bmvs_clock_wmask
python launch.py --config configs/neus-dtu.yaml --gpu 0 --train system.loss.lambda_mask=0.1
eg: neus_bmvs_bear_womask
python launch.py --config configs/neus-dtu.yaml --gpu 0 --train
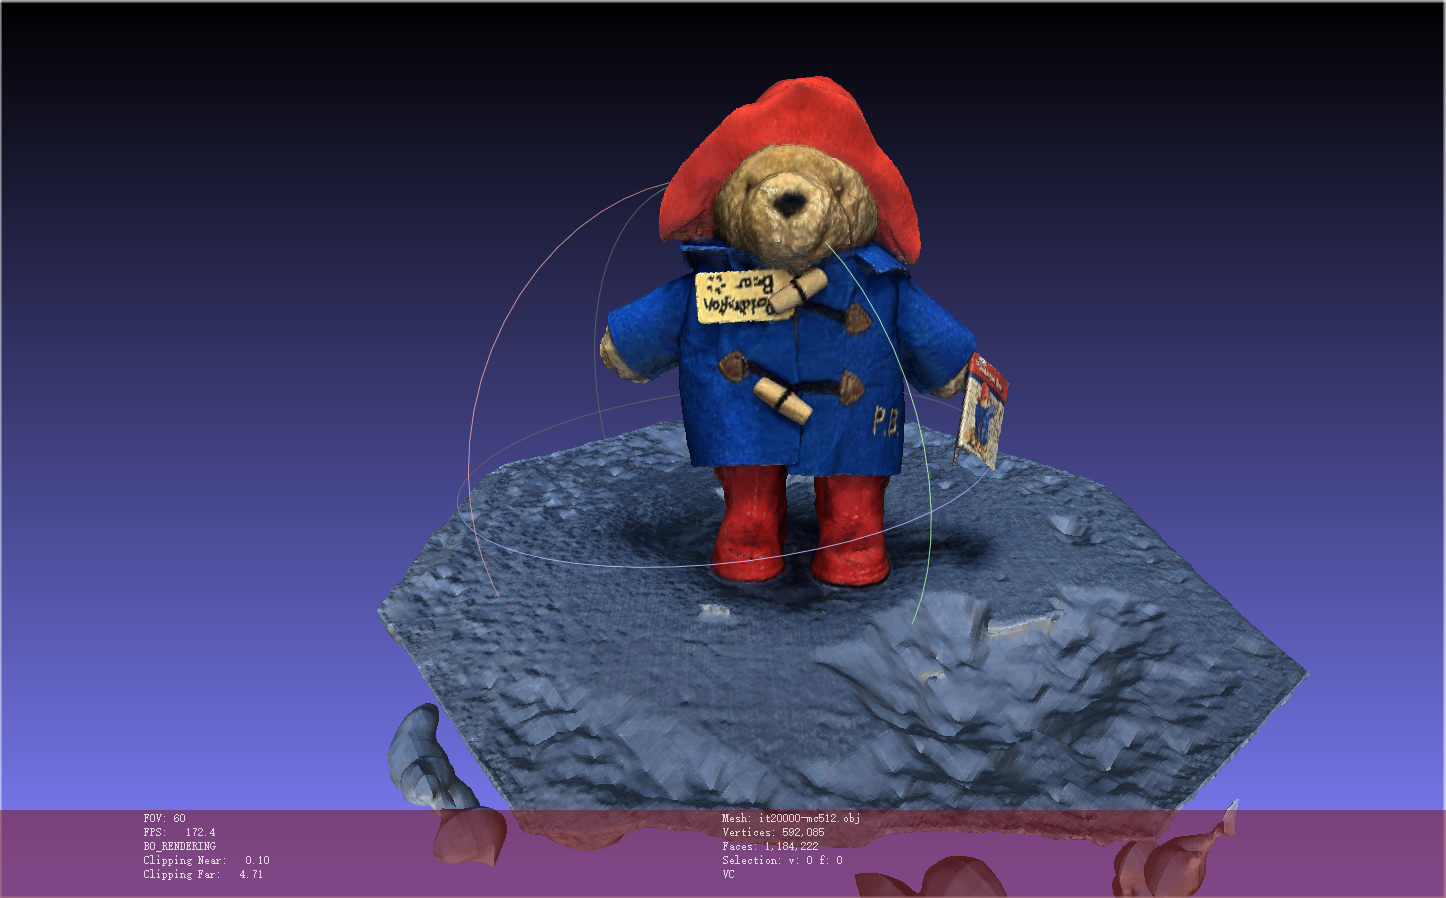
eg: neus_bmvs_bear_womask 给毛绒物体添加缺陷
- 修改images中的照片数据or自己做一个照片数据(毛绒玩具)
自定义数据集
服务器环境配置colmap (未完成)
1 | git clone https://ceres-solver.googlesource.com/ceres-solver |
本地处理数据集(同neus类似BMVS数据集形式)
同neus使用自定义数据集NeuS
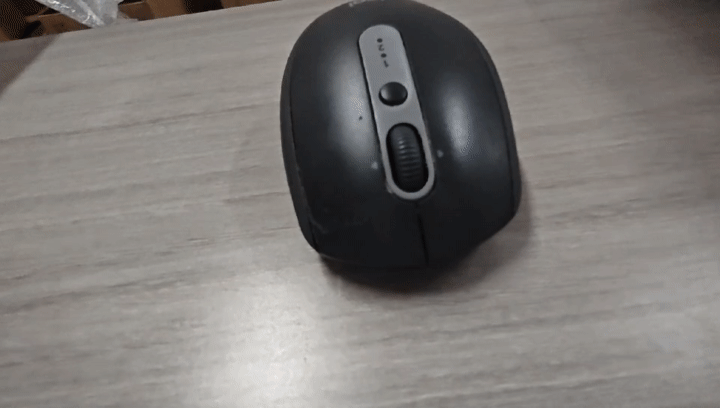
eg: 使用neus自定义数据集对M590三维重建
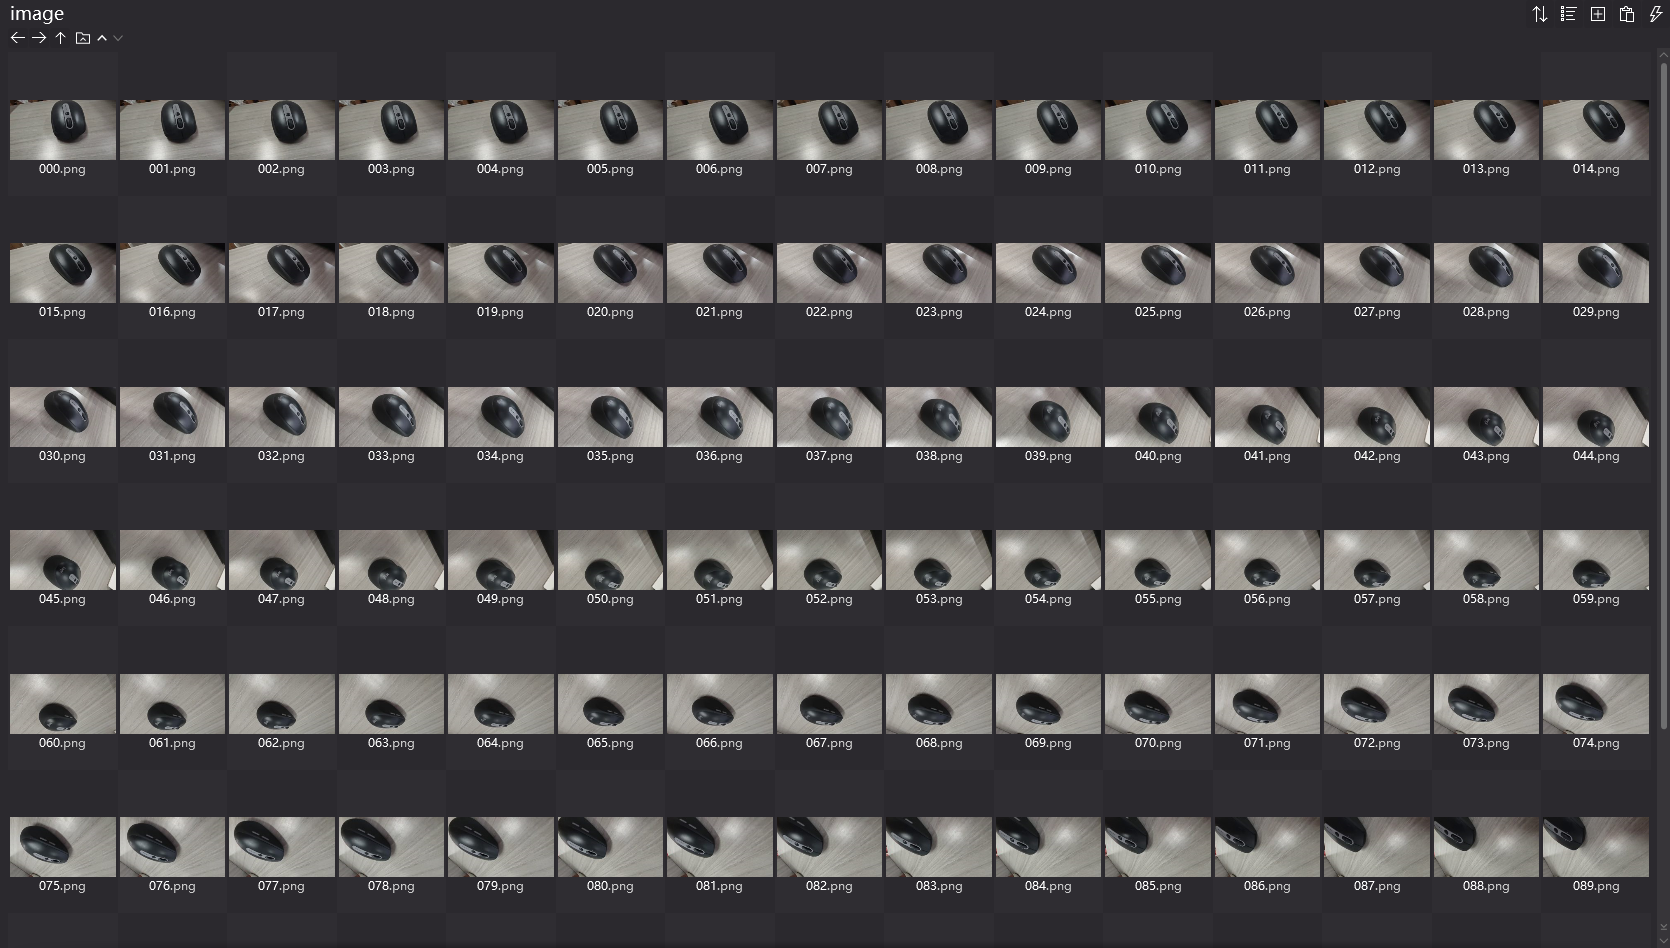
- 拍M590视频
- video2img.py,将mp4按帧拆分成png,并生成mask文件夹
- 使用colmap对image下图片进行处理,得到相机位姿和点云ply等文件
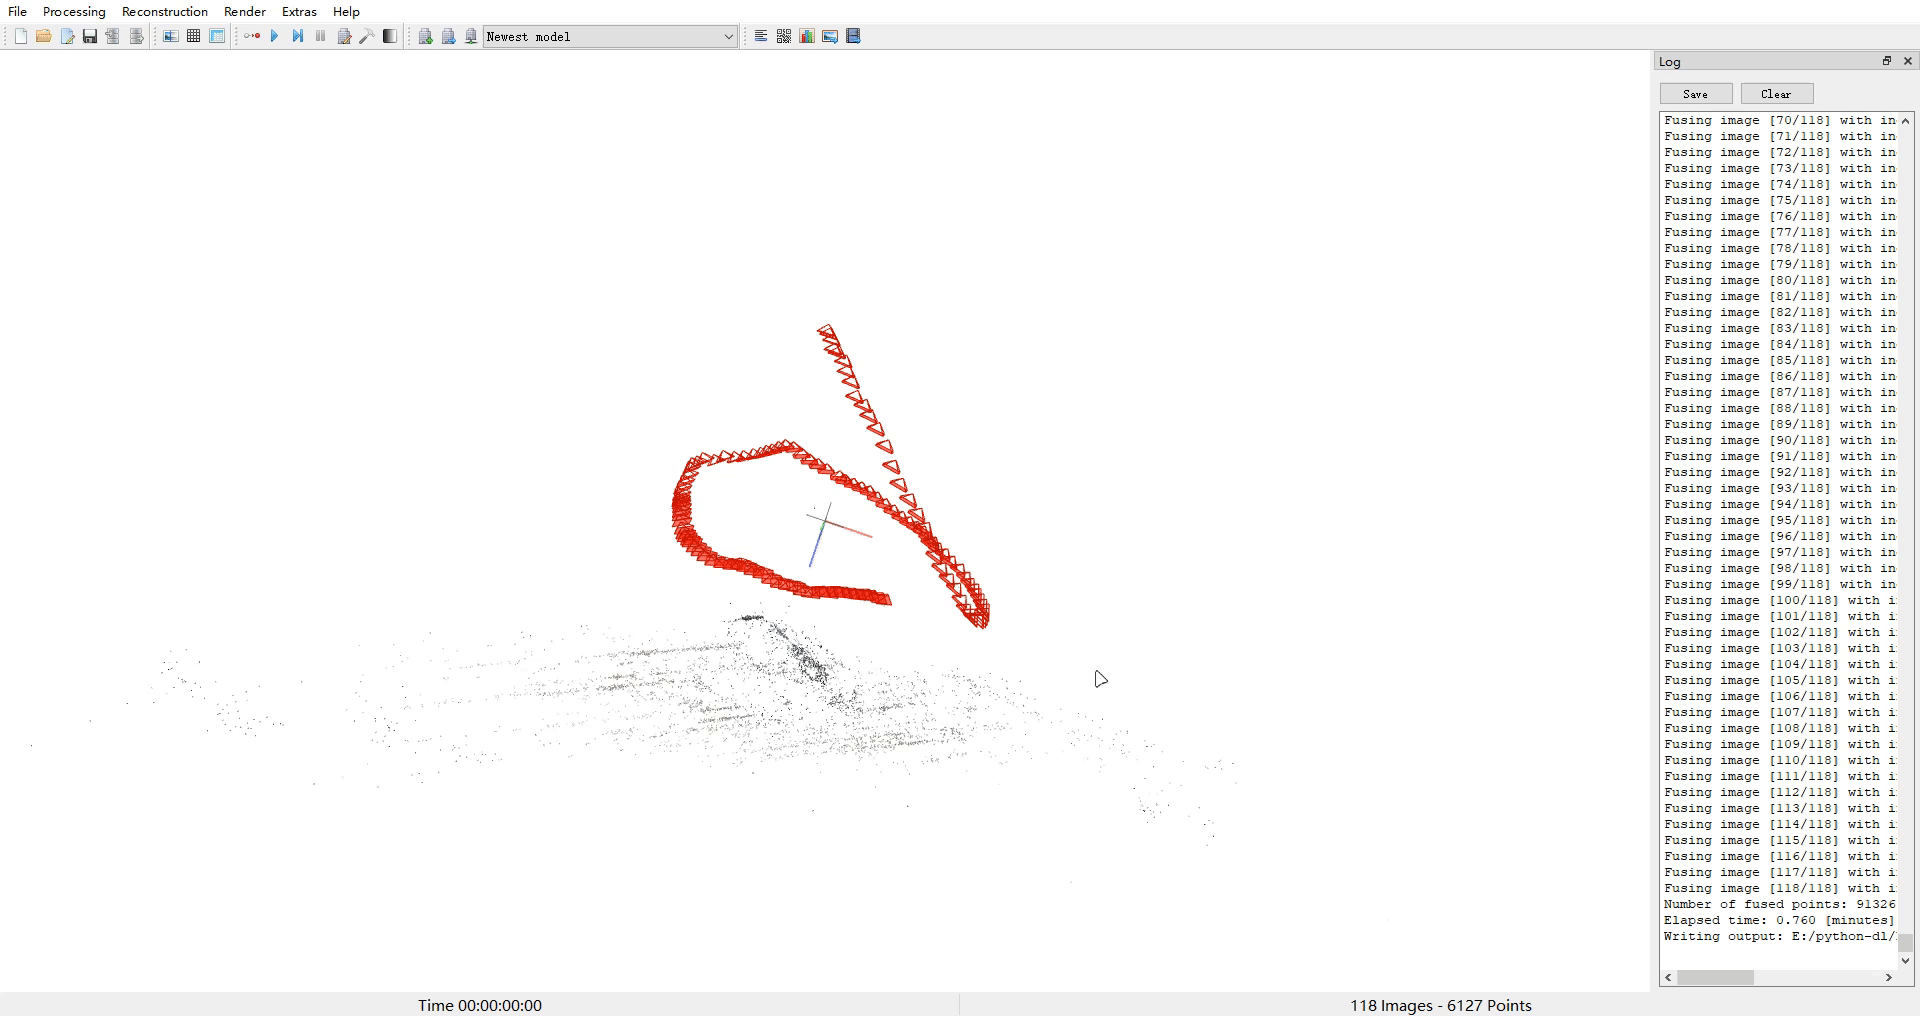
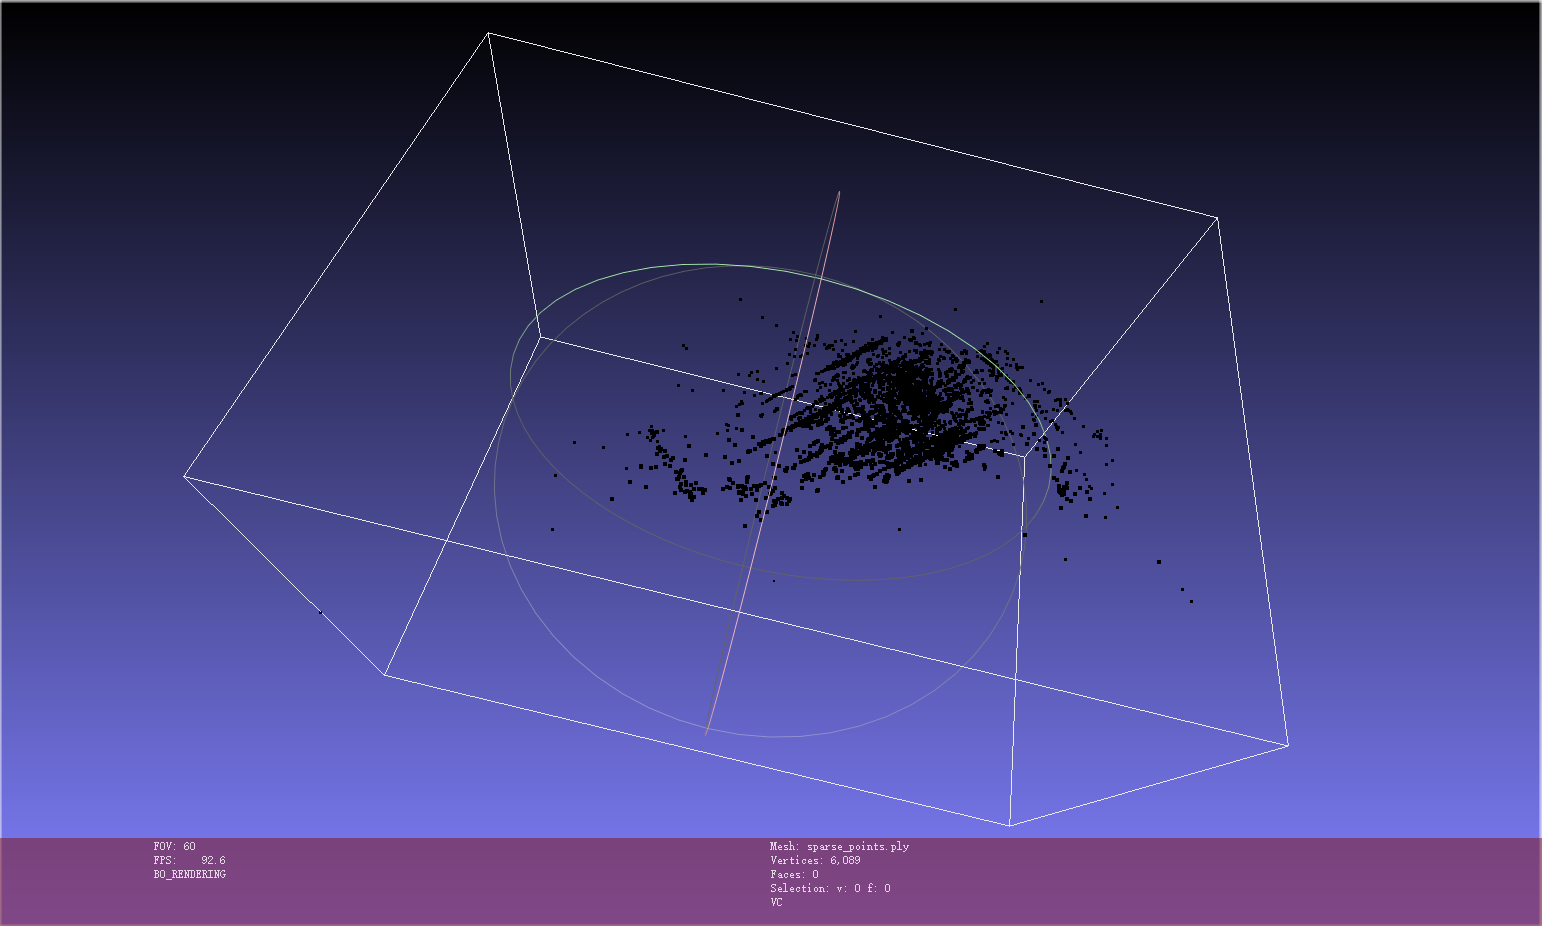
- 使用img2poses.py得到sparse_points.ply
cd colmap_preprocess ##neus/preprocess_custom_data/colmap_preprocess/python imgs2poses.py ${data_dir}
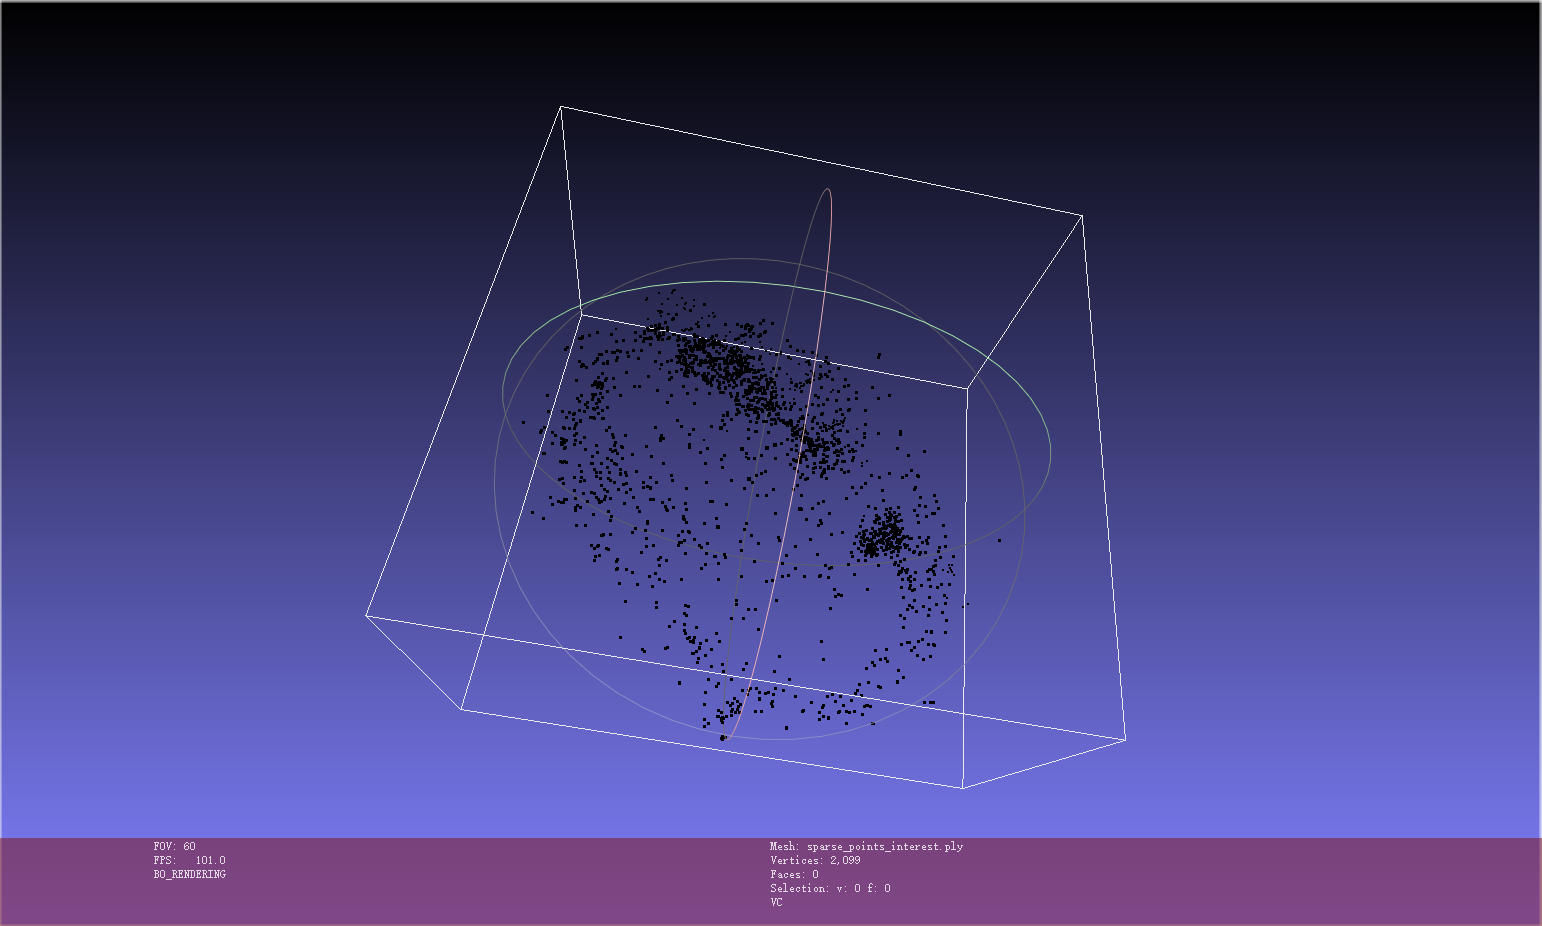
- 根据sparse_points.ply在meshlab中进行clean操作,只保留interest区域的点云,并保存为${data_dir}/sparse_points_interest.ply
- 使用gen_cameras.py生成npz文件
python gen_cameras.py ${data_dir}- 在 ${data_dir}下生成preprocessed,包括image、mask和cameras_sphere.npz,但image和mask下无文件,需要自行拷贝
- 打包成zip,上传到百度云盘,然后在AutoDL的AutoPanel中下载到服务器的/root/autodl-tmp文件夹下
- 解压到/instant-nsr-pl/load文件夹下,修改config/neus-dtu.yaml文件中的数据集路径
- 运行
python launch.py --config configs/neus-dtu.yaml --gpu 0 --train - train结束后得到obj文件,下载到本地使用meshlab打开
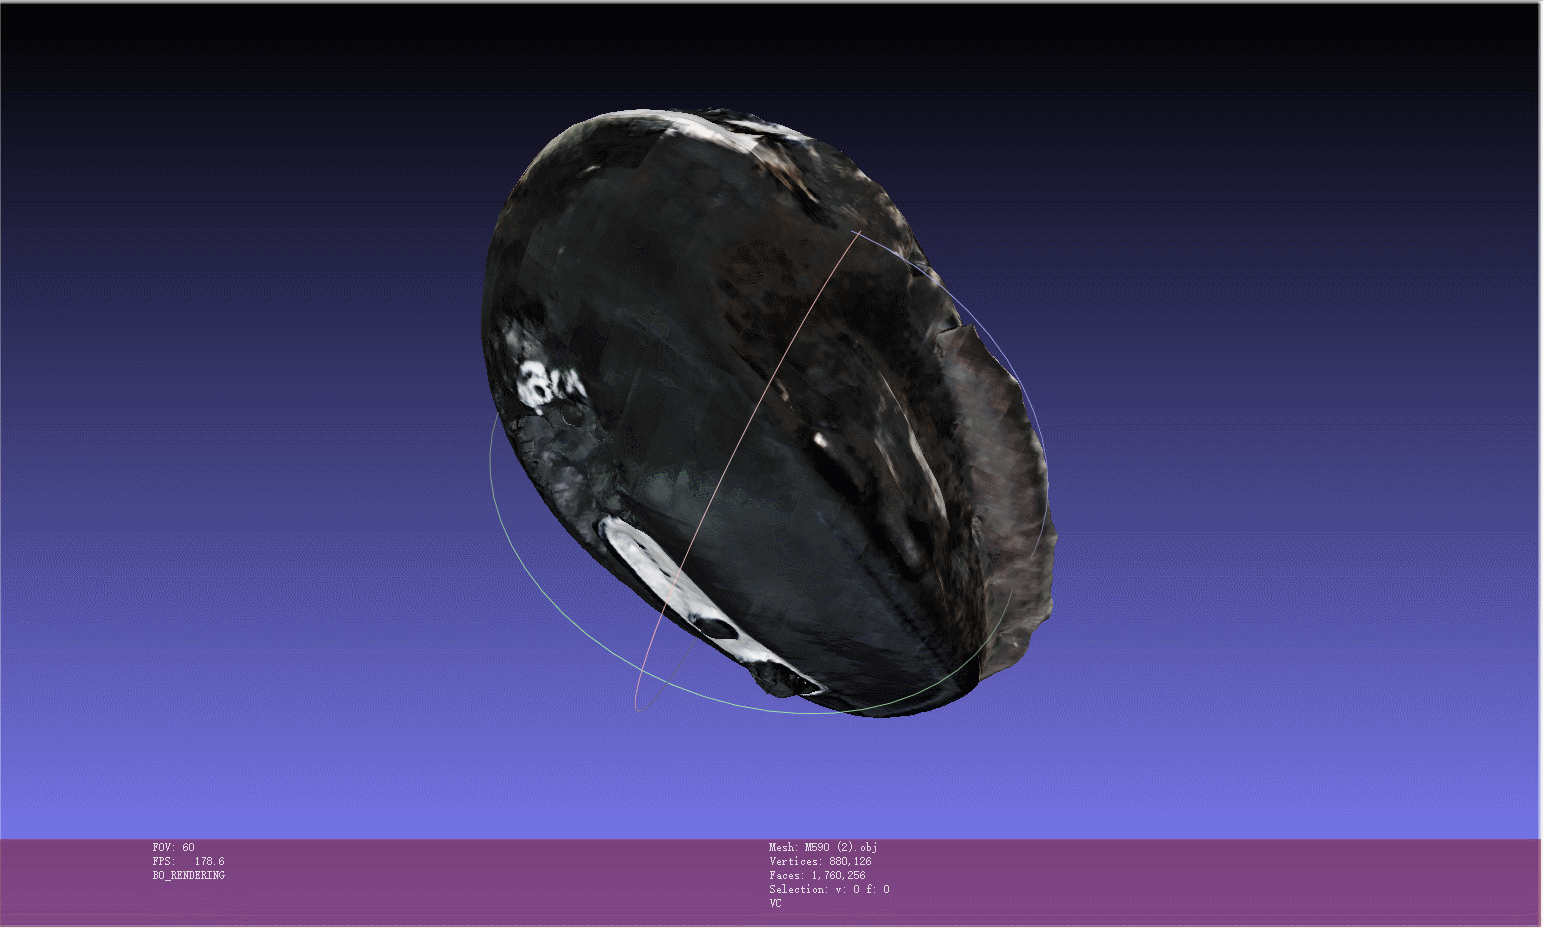
分析
- 数据集使用xiaomi13录制成视频然后跳帧选取图片得到,会有一些反光和阴影
- M590的右键部分有一块大的缺陷,这是由于数据集在右键部分信息太少(反光,阴影)
- M590的下部分没有建模出来,这是由于数据集未录制其下部分的信息
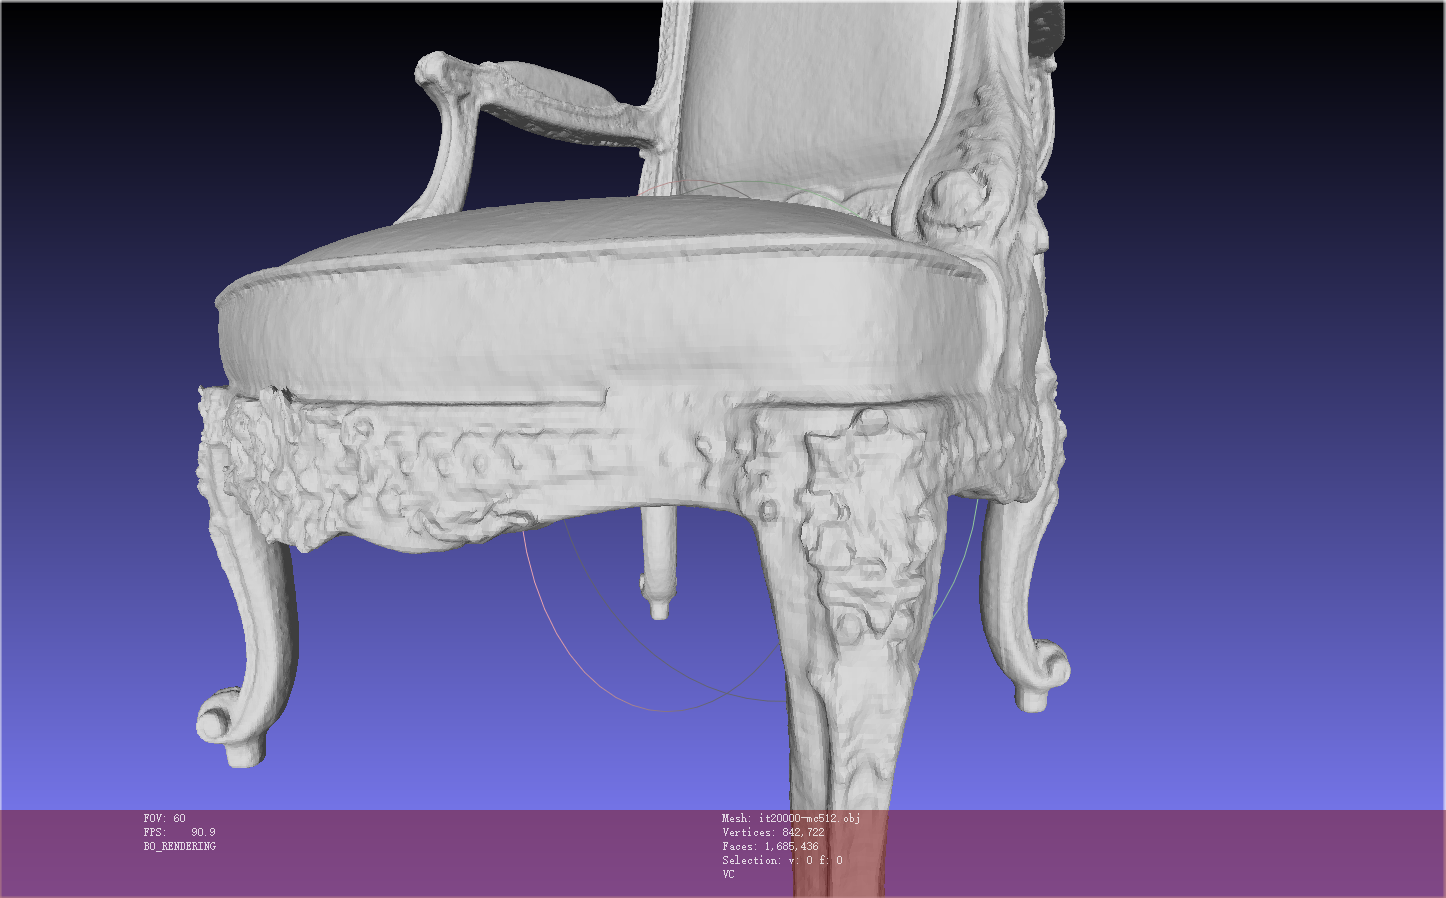
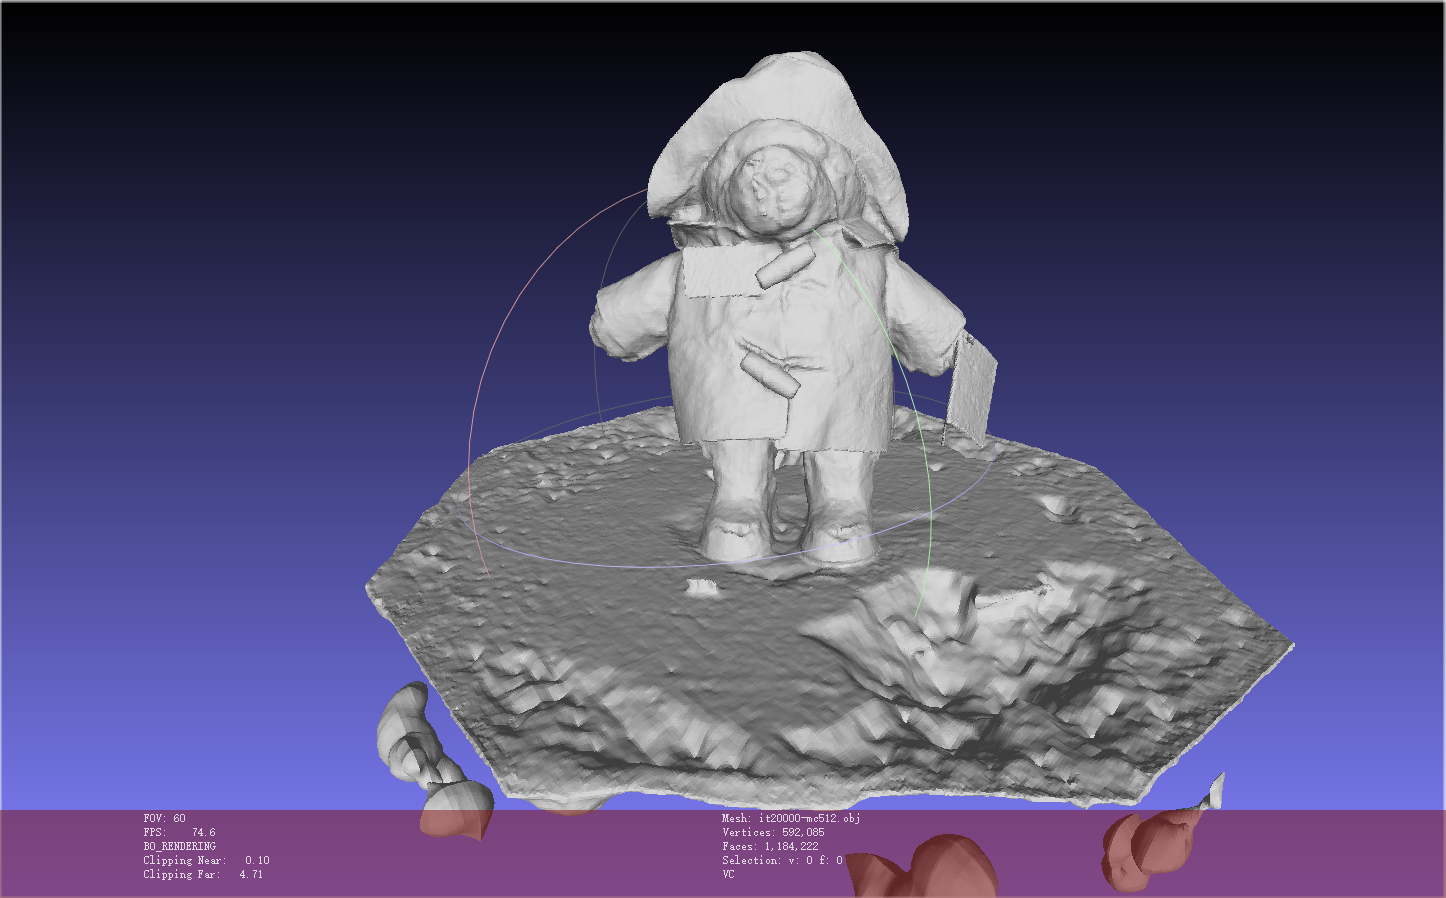
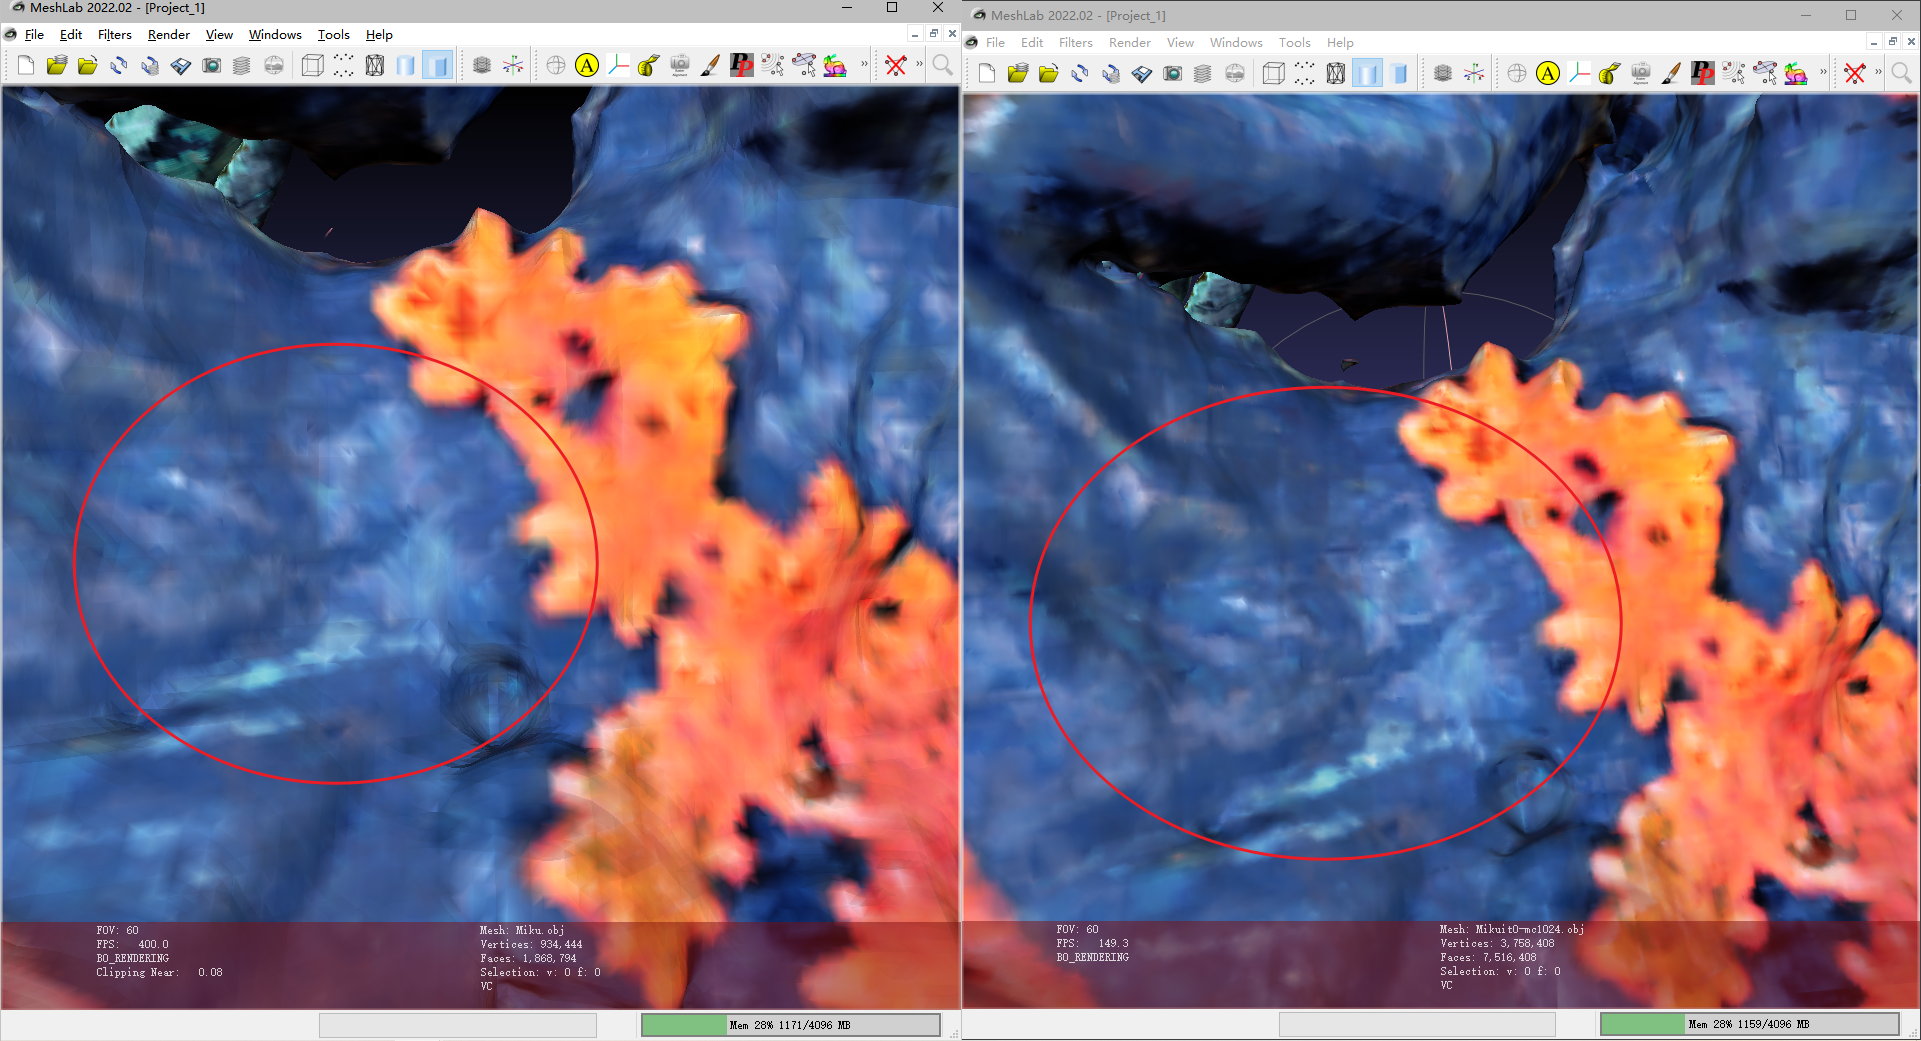
eg: 对Miku进行重建
1 | python launch.py --config configs/neus-dtu.yaml --gpu 0 --train |
效果不太好
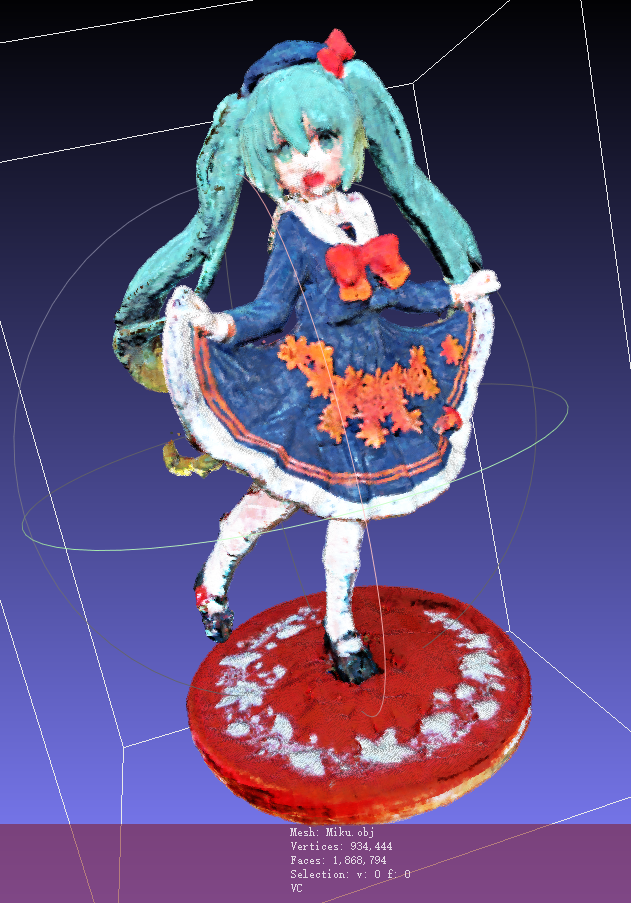
更改resolution=1024 后,点更多更细致,但是由于训练出来的sdf网络相同,在相近的两个位置,sdf值相同,因此大体还是一样的模型,只是细节处有所不同(面数多了)
使用更高质量的数据集
当使用更高质量的数据集(178x1080x1920)时,会爆显存(RTX3090-24G),下采样到(540x960)…
1 | name: dtu |
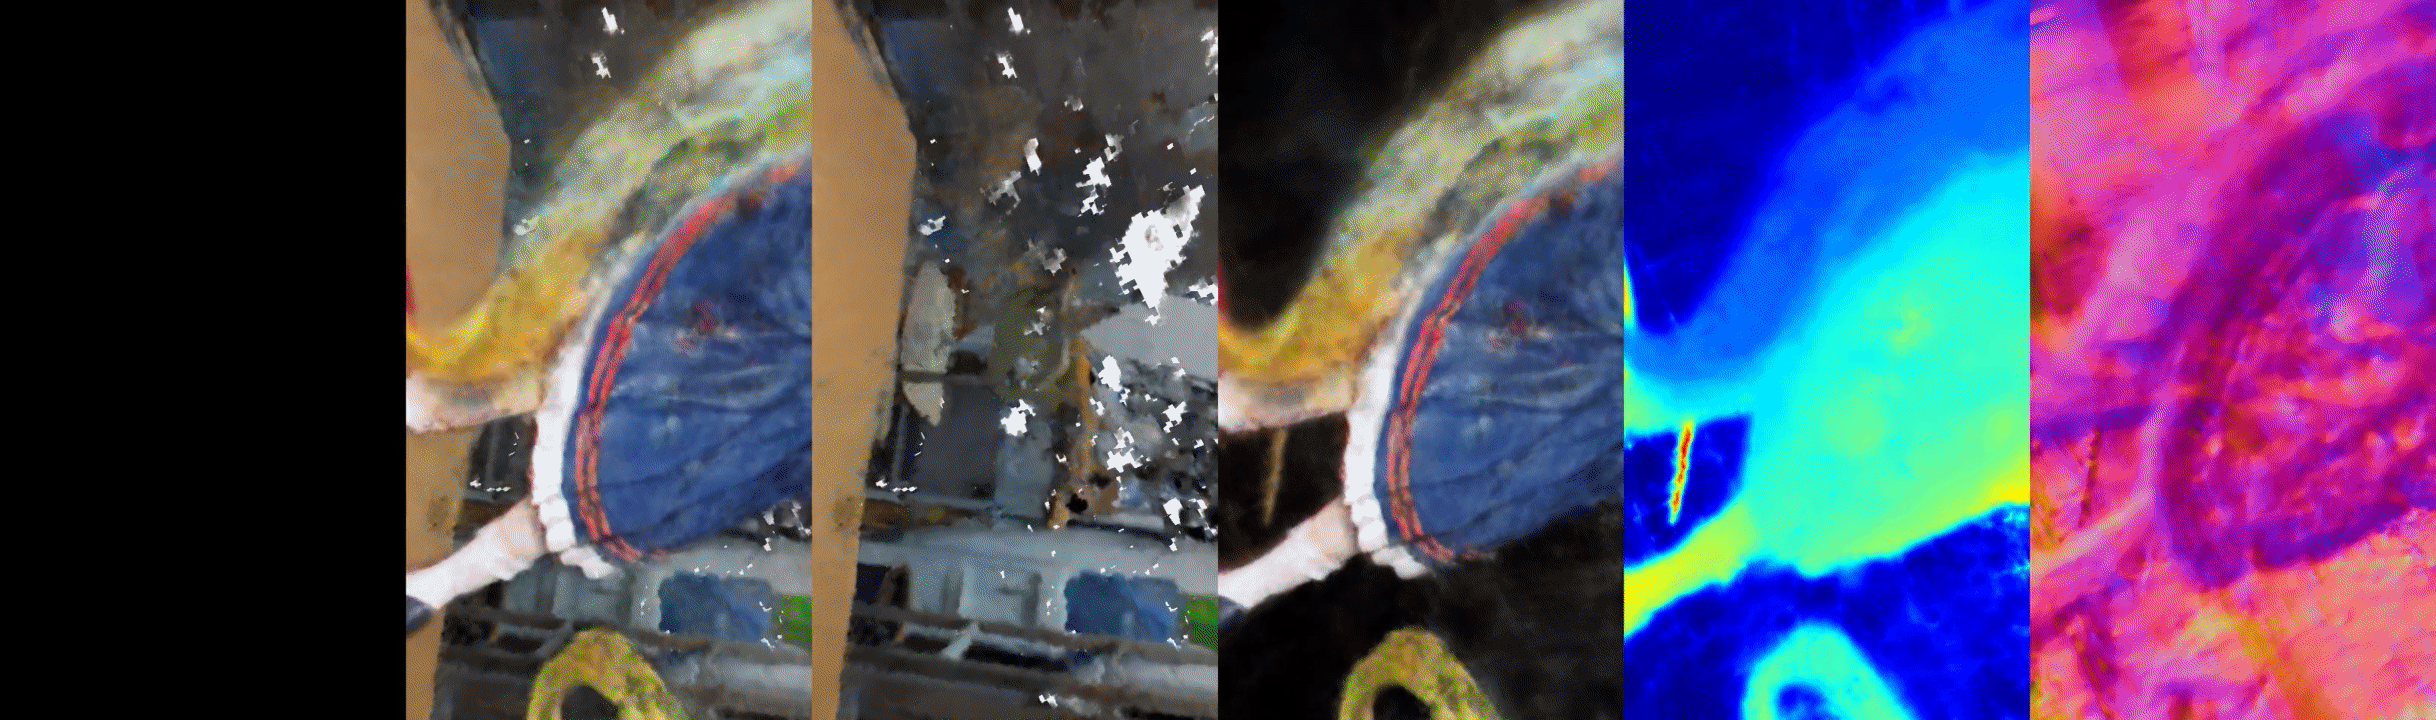
当使用原来的cameras_sphere.npz文件,即高质量数据集使用低质量生成的相机内参矩阵和c2w矩阵时,对应不上,会导致生成的隐式模型错位(左2,4),生成的背景也很杂乱(3)
且FFMPEG会报错1
2IMAGEIO FFMPEG_WRITER WARNING: input image is not divisible by macro_block_size=16, resizing from (3240, 960) to (3248, 960) to ensure video compatibility with most codecs and players. To prevent resizing, make your input image divisible by the macro_block_size or set the macro_block_size to 1 (risking incompatibility).
[swscaler @ 0x5d9be80] Warning: data is not aligned! This can lead to a speed loss
重新使用colmap和img2poses.py及gen_cameras.py生成一下cameras_sphere.npz:
cd to colmap_preprocess
python imgs2poses.py ..\Miku
python gen_cameras.py ..\Miku
cd to instant-nsr-pl
python launch.py --config configs/neus-dtu.yaml --gpu 0 --train
python launch.py --config configs/neus-dtu.yaml --resume exp/neus-dtu-miku_l/@20230712-162601/ckpt/epoch=0-step=20000.ckpt --gpu 0 --test
依然会error: This can lead to a speed loss,数据未对齐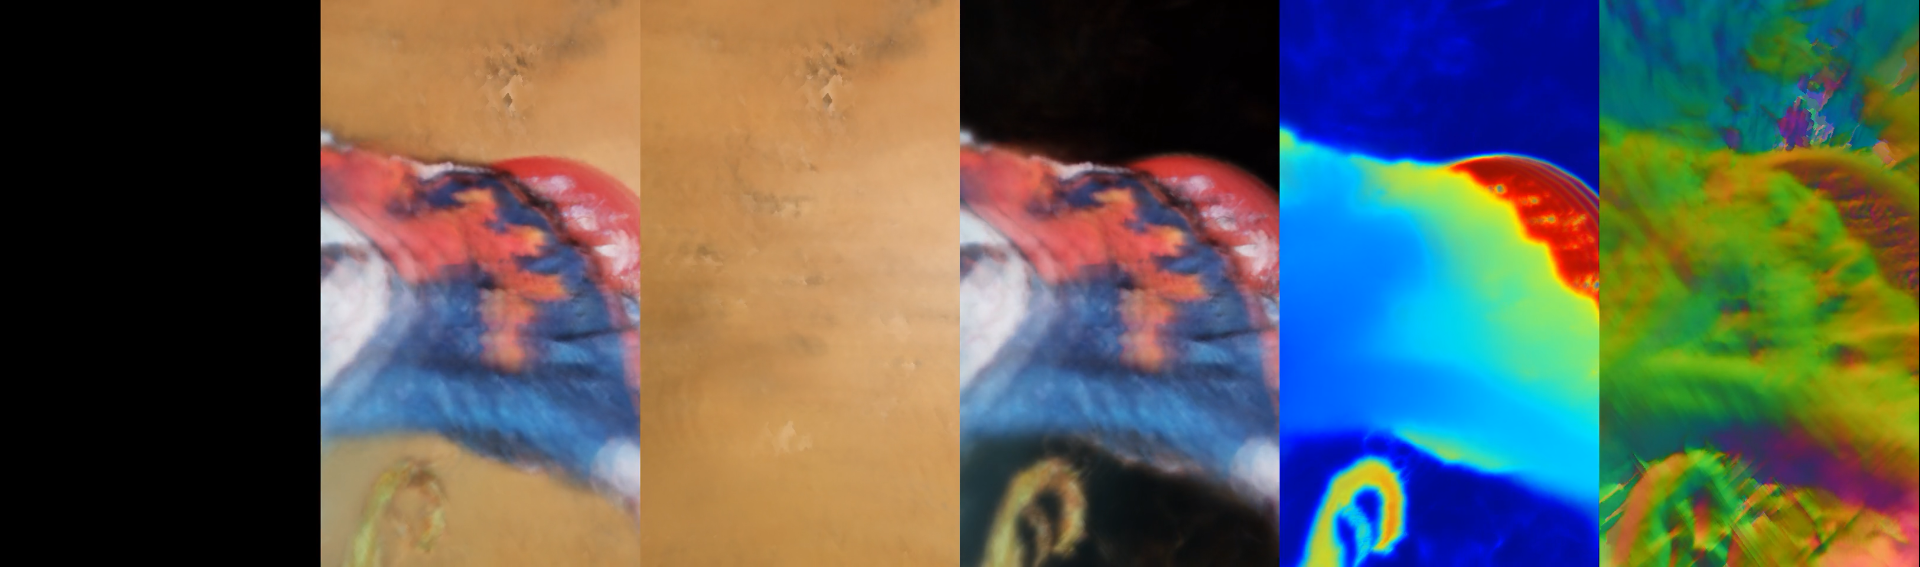
使用更高质量的数据集,将step增加一倍