| Title | Nerfstudio: A Modular Framework for Neural Radiance Field Development |
|---|---|
| Author | Tancik, Matthew and Weber, Ethan and Ng, Evonne and Li, Ruilong and Yi, Brentand Kerr, Justin and Wang, Terrance and Kristoffersen, Alexander and Austin,Jake and Salahi, Kamyar and Ahuja, Abhik and McAllister, David and Kanazawa,Angjoo |
| Conf/Jour | ACM SIGGRAPH 2023 Conference Proceedings |
| Year | 2023 |
| Project | nerfstudio-project/nerfstudio: A collaboration friendly studio for NeRFs (github.com) |
| Paper | Nerfstudio: A Modular Framework for Neural Radiance Field Development (readpaper.com) |
Nerfstudio提供了一个简单的API,可以简化创建、训练和测试NeRF的端到端过程。该库通过将每个组件模块化,支持更易于理解的NeRF实现。通过更模块化的NeRF,我们希望为探索这项技术提供更用户友好的体验。
Autodl使用
选择实例,pytorch2.0.0,python3.8,cuda11.8
环境配置
1 | conda create --name nerfstudio -y python=3.8 |
for cuda11.8,需要很长时间1
2pip install torch==2.0.1+cu118 torchvision==0.15.2+cu118 --extra-index-url https://download.pytorch.org/whl/cu118
pip install ninja git+https://github.com/NVlabs/tiny-cuda-nn/#subdirectory=bindings/torch
1 | pip install nerfstudio |
安装FFmpeg
在Ubuntu 20.04 中安装FFMPEG-之路教程 (onitroad.com)1
2
3
4sudo apt update
sudo apt install ffmpeg
ffmpeg -version
安装Colmap
1 | sudo apt update |
sudo apt install colmap
加载数据&训练model
ns-train nerfacto --data data/nerfstudio/poster
Download some test data:
ns-download-data nerfstudio --capture-name=poster
[!error]
AutoDL连接不了google drive,只能使用自己的数据集or:
使用google的colab下载数据集并将其打包成zip,然后再上传到autodlUse Own Data
配好环境后,可以在任意地址创建文件夹,放入需要训练的数据集
ns-process-data {video,images,polycam,record3d} --data {DATA_PATH} --output-dir {PROCESSED_DATA_DIR}
ns-process-data {images, video} --data {DATA_PATH} --output-dir {PROCESSED_DATA_DIR}
eg: Miku
cd autodl-tmpns-process-data images --data data/images --output-dir data/nerfstudio/images_name
跳过图像处理:复制和缩放ns-process-data images --data data/Miku/image/ --output-dir data/nerfstudio/Miku --skip-image-processing
1 | 06.29: |
in viewer: it is easy to view results and process
Train model
ns-train nerfacto --data data/nerfstudio/poster
export
mesh
手动调整参数得到命令:
1 | ns-export poisson --load-config outputs/Miku/nerfacto/2023-06-30_155708/config.yml --output-dir exports/mesh/ --target-num-faces 50000 --num-pixels-per-side 2048 --normal-method open3d --num-points 1000000 --remove-outliers True --use-bounding-box True --bounding-box-min -0.5 -0.5 -1 --bounding-box-max 0.5 0.5 0 |
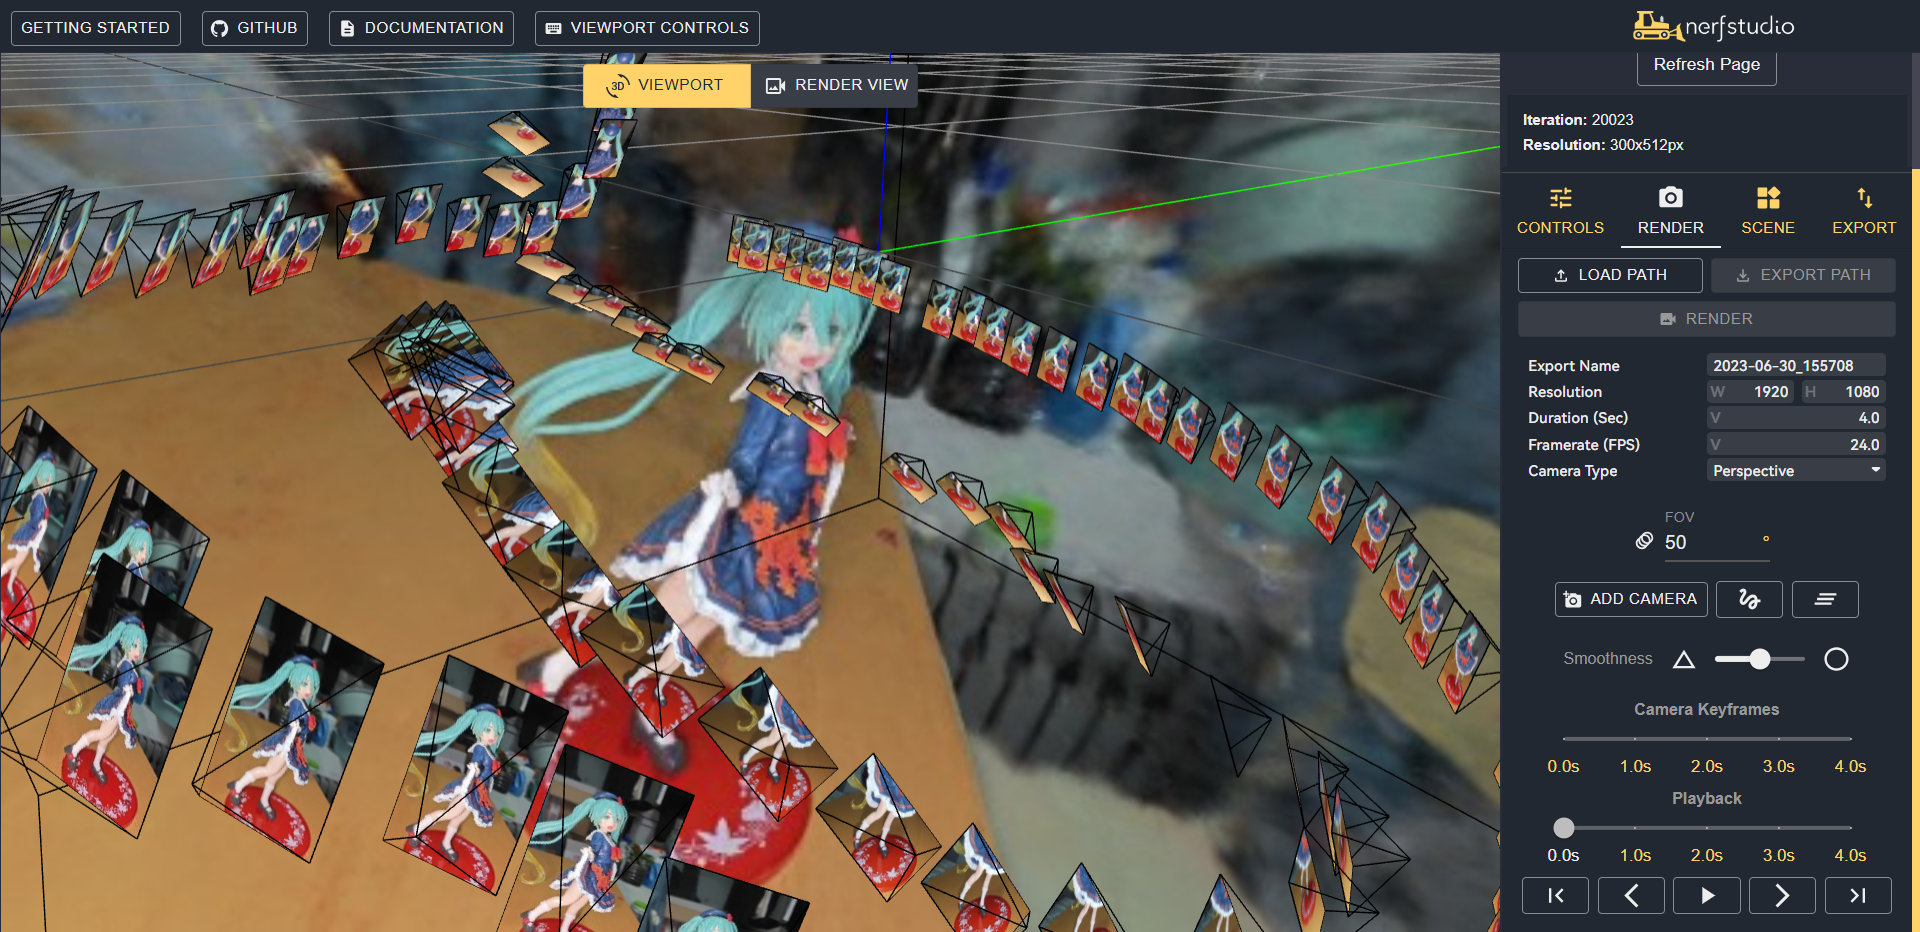
使用viewer
autodl
本地运行:ssh -CNg -L 6006:127.0.0.1:6006 root@123.125.240.150 -p 42151
[!important]
本地端口:localhost:远程端口
一般本地进入服务器(ssh)ssh -p 23394 root@connect.beijinga.seetacloud.com
将服务器6006端口映射到本地的6006端口上ssh -CNg -L 6006:127.0.0.1:6006 root@connect.beijinga.seetacloud.com -p 23394
viewer
一般nerfstudio的viewer运行在本地的7007端口上ssh -L 7007:localhost:7007 <username>@<remote-machine-ip>
需要在本地再开一个终端,并运行,将本地的6006端口与远程的7007进行绑定
- eg:
ssh -L 7007:localhost:7007 root@connect.beijinga.seetacloud.com -p 23394 - ssh -L 7007:localhost:7007 root@
-p port
此时打开nerfstudio viewer,在Getting started中输入ws://localhost:7007,即可在viewer中查看
更换服务器的端口
- 当服务器的7007被占用时:
默认为7007,修改端口7007为6006 并训练
ns-train nerfacto --data data/nerfstudio/poster --viewer.websocket-port 6006 - 此时在本地需运行
ssh -L 7007:localhost:6006 root@connect.beijinga.seetacloud.com -p 23394